Fixing NVidia With Wayland on Ubuntu 24.04 (Noble Numbat)
Table of Contents
The Problem
Switching from X11 to Wayland (on Ubuntu 24.04 (Noble Numbat)) initially prevented launching the Settings so I went on a hunt to fix it (and here are my notes).
The Problems
WayDroid and X11
I was poking around and saw that there was a project to run Android on PCs (among other things) called Waydroid so I installed it, but whenever I tried to enter the Waydroid shell
sudo waydroid shell
I got an error saying that the waydroid session is stopped. This isn't a post about waydroid so I'll skip the troubleshooting I did, but ultimately I found an AskUbuntu post from someone who ran into the same problem and found from one of the comments that:
it turns out that waydroid is not compatible with X11.
Maybe it's called Waydroid because it needs Wayland? Anyway I checked if I was using Wayland:
echo $XDG_SESSION_TYPE
Which didn't show that I was (I can't remember if it showed X11 or was just empty, but it wasn't anything like "Wayland" anyway). It turned out I had chosen "Ubuntu" at the login screen, not "Ubuntu Wayland" so I logged out, switched to Wayland and then logged in. This seemed to fix the initial WayDroid problem (I got the GUI running but I still haven't finished the installation) but then another problem came up.
The Next Problem - Sleep and Logging out
Having switched to Wayland I decided I needed a break. While I was away my computer went to the lock screen, as it usually does, but when I opened it back up I found that instead of just locking the screen it had actually logged me out, killing all the applications I left open and closing an encrypted mount point I had open. More searching ensued.
Once again, someone posted a question on AskUbuntu that seemed to be about the same problem, the suggested answer being to disable the Screen Lock, which didn't really seem to be a good answer, but it was an answer, which was one more than I started with so I decided to give it a try. But then the next problem appeared.
No Settings
When I tried to launch the settings an icon came up in the launcher like normal but the settings wouldn't come up. Okay. I'm skipping some of the intermediate searches but eventually I tried running the settings in the terminal to look for the errors.
gnome-control-center
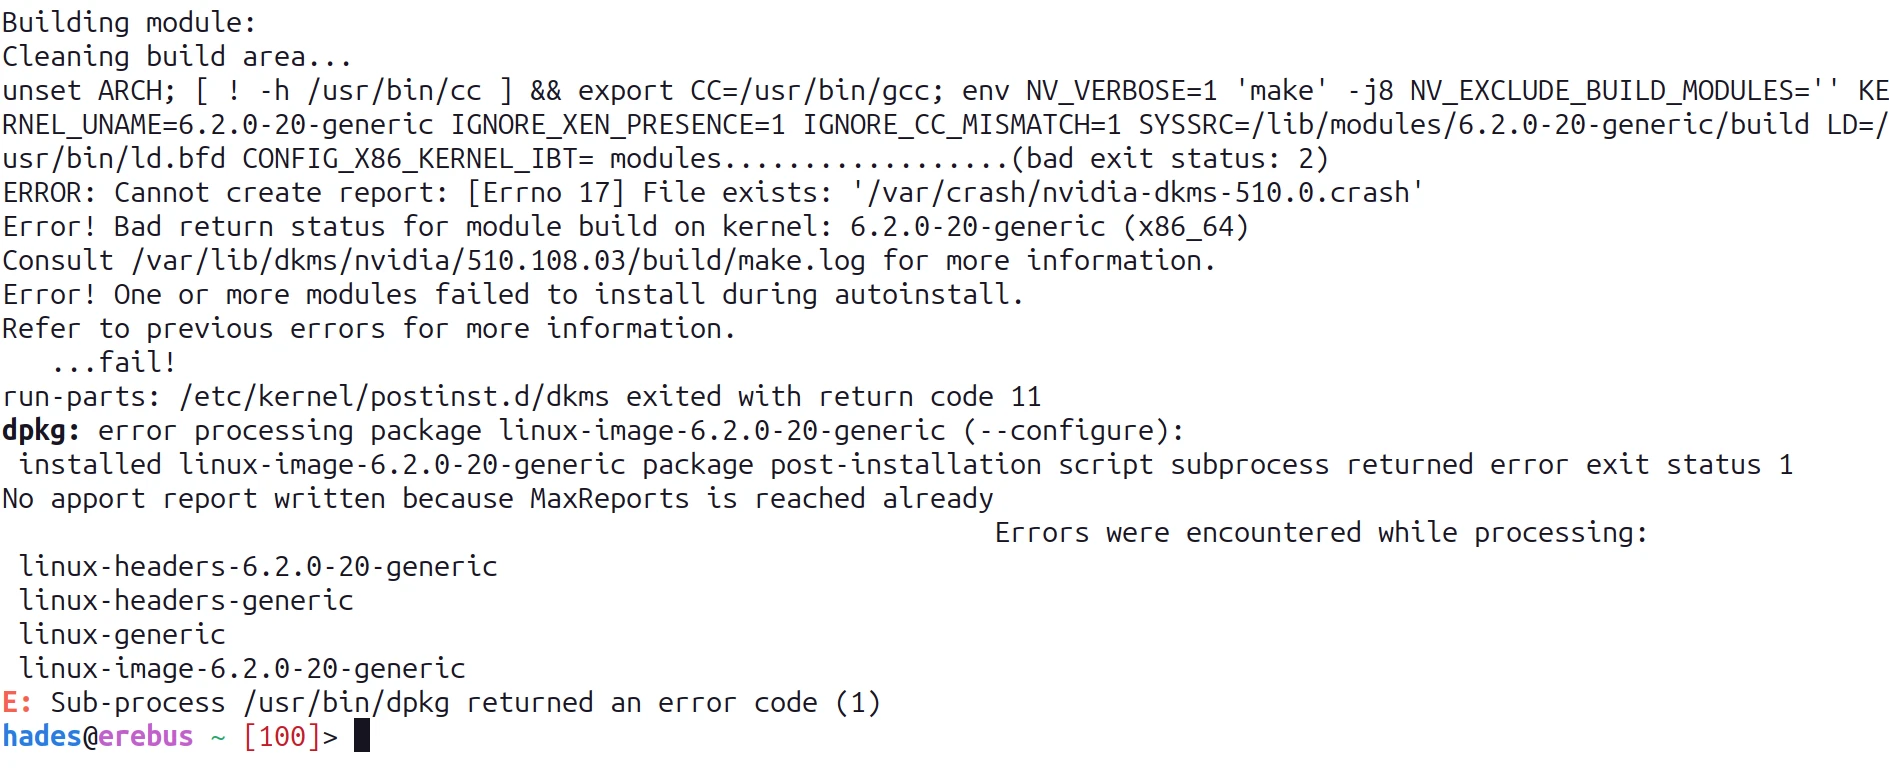
This gave an error which included "failed to create dri2 screen" so I went on a search again and found another AskUbuntu post with a suggested answer - install a package:
sudo apt install libnvidia-egl-wayland1
After logging out and logging back in the settings worked and the lock screen no longer logged me out so this seems to have been the fix (for these problems, there's still some weird things going on but nothing I can't live with yet.)
Conclusion
There's an open bug on Launchpad (Gnome apps segfault in Nvidia (535) Wayland sessions on Noble, but 550 works) which looks like it might be related to the problem I ran into. It says that upgrading the NVidia driver to 550 fixes the Gnome Settings problem but the upgrade then introduces some other errors so installing libnvidia-egl-wayland1 looks like the right fix. The bug was opened on April 26, 2024 so I would imagine it would effect more people, making this a high priority. Perhaps Wayland isn't widely used, at least not among nvidia users. I'm typing this in emacs and portions of the buffer are messed up, making it dangerous to use (insofar as I can't tell if the text actually exists in the document in the same place where it appears on the screen) so I'll probably go back to X11 until they get this stuff worked out, but at least it's working a little better than it was this morning.
Links
- Waydroid : The start of the problem
- Ask Ubuntu - how do I resolve the "waydroid session is stopped" problem?: The First Problem
- Ask Ubuntu - "Ubuntu 23.04 logs me out arbitrarily while going to sleep mode": The second problem.
- Ask Ubuntu- Ubuntu 24.04 with Nvidia driver "libEGL warning: egl: failed to create dri2 screen": The solution post.
- Launchpad - Gnome apps segfault in Nvidia (535) Wayland sessions on Noble, but 550 works : Possibly related bug.
- GitHub Gist - waydroid on x11.md : Possible way around Wayland for Waydroid. Also has other useful notes for Waydroid.