Flask, TensorFlow, Streamlit and the MNIST Dataset
Table of Contents
Beginning
This is a re-working of Coursera's Neural Network Vizualizer Web App With Python course. What we'll do is use tensorflow to build a model to classify images of handwritten digits from the MNIST Database of Handwritten Digits which tensoflow provides as one of their pre-built datasets. MNIST (according to wikipedia) stands for Modified National Institute of Standards and Technology (so we're using the Modified NIST Database).
Once we have the model we'll use Flask to serve up the model and Streamlit to build a web page to view the results.
Set Up
Parts
These are the libraries that we will use.
- Python
from functools import partial
from pathlib import Path

import os
- PyPi
from bokeh.models import HoverTool
from dotenv import load_dotenv

import matplotlib.pyplot as pyplot
import numpy
import pandas
import hvplot.pandas
import seaborn
import tensorflow
- My Stuff
from graeae import EmbedHoloviews
The Environment
load_dotenv(".env", override=True)
Plotting
There won't be a lot of plotting, but we'll use matplotlib with seaborn to look at some images to see what they look like and HVplot to do other visualizations.
get_ipython().run_line_magic('matplotlib', 'inline')
get_ipython().run_line_magic('config', "InlineBackend.figure_format = 'retina'")
seaborn.set(style="whitegrid",
            rc={"axes.grid": False,
                "font.family": ["sans-serif"],
                "font.sans-serif": ["Open Sans", "Latin Modern Sans", "Lato"],
                "figure.figsize": (8, 6)},
            font_scale=1)
This is for the nikola posts. If you run the jupyter kernel on a remote machine there's going to be two behaviors for the plot-files. If you create the file in the code block (like I do for the HVPlot plots) then the file will show up on the remote machine. If you use the :file argument in the org-mode header (like I do for matplotlib) it will create the file on the machine where you're running emacs. Given this behavior it might make more sense to edit the emacs file on the remote machine so all the files are created there… next time.
SLUG = "flask-tensorflow-and-mnist"
OUTPUT = Path("../../files/posts/keras/")/SLUG
Embed = partial(EmbedHoloviews, folder_path=OUTPUT)
The Random Seed
Since I'm commenting on the outcomes I'll set the random seed to try and make things more consistent.
tensorflow.random.set_seed(2020)
The Data
Like I mentioned, tensorflow includes the MNIST data set that we can grab with the load_data function. It returns two tuples of numpy arrays.
(x_train, y_train), (x_test, y_test) = tensorflow.keras.datasets.mnist.load_data()
Let's see how much data we have.
rows, width, height = x_train.shape
print(f"Training:\t{rows:,} images\timage = {width} x {height}")
rows, width, height = x_test.shape
print(f"Testing:\t{rows:,} images\timage = {width} x {height}")
Training:       60,000 images   image = 28 x 28
Testing:        10,000 images   image = 28 x 28
A Note On the Tangling
I'm going to do this as a literate programming document with the tangle going into a temporary folder. I was creating the temporary folder using python but I'm running the code on a different machine from where I'm editing this document so running python executes on the remote machine but tangling out the files happens on my local machine. Maybe next time it will make more sense to edit the document on the remote machine (note to future self). Although that also introduces problems because then I'd have to run the tests headless… Every solution has a problem.
Middle
The Data
The Distribution
First, we can look at the distribution of the digits to see if they are equally represented.
labels = (pandas.Series(y_train).value_counts(sort=False)
          .reset_index()
          .rename(columns={"index": "Digit",
                           0: "Count"}))
hover = HoverTool(
    tooltips=[
        ("Digit", "@Digit"),
        ("Count", "@Count{0,0}"),
    ]
)
plot = labels.hvplot.bar(x="Digit", y="Count").opts(
    height=800,
    width=1000,
    title="Digit Counts",
    tools=[hover],
)

output = Embed(plot=plot, file_name="digit_distribution")
output()
If you look at the values for the counts you can see that there is a pretty significant difference between 1 and 5.
print(f"{int(labels.iloc[1].Count - labels.iloc[5].Count):,}")
1,321
But we're doing this as an exercise to get a web-page up more so than build a real model so let's not worry about that for now.
Some Example Digits
We'll make a 4 x 4 grid of the first 16 images to see what they look like. Note that our array uses 0-based indexing but matplotlib uses 1-based indexing so we have to make sure that the reference to the cell in the subplot is one ahead of the index for the array.
IMAGES = 16
ROWS = COLUMNS = 4

for index in range(IMAGES):
    pyplot.subplot(ROWS, COLUMNS, index + 1)
    pyplot.imshow(x_train[index], cmap='binary')
    pyplot.xlabel(str(y_train[index]))
    pyplot.xticks([])
    pyplot.yticks([])
pyplot.show()
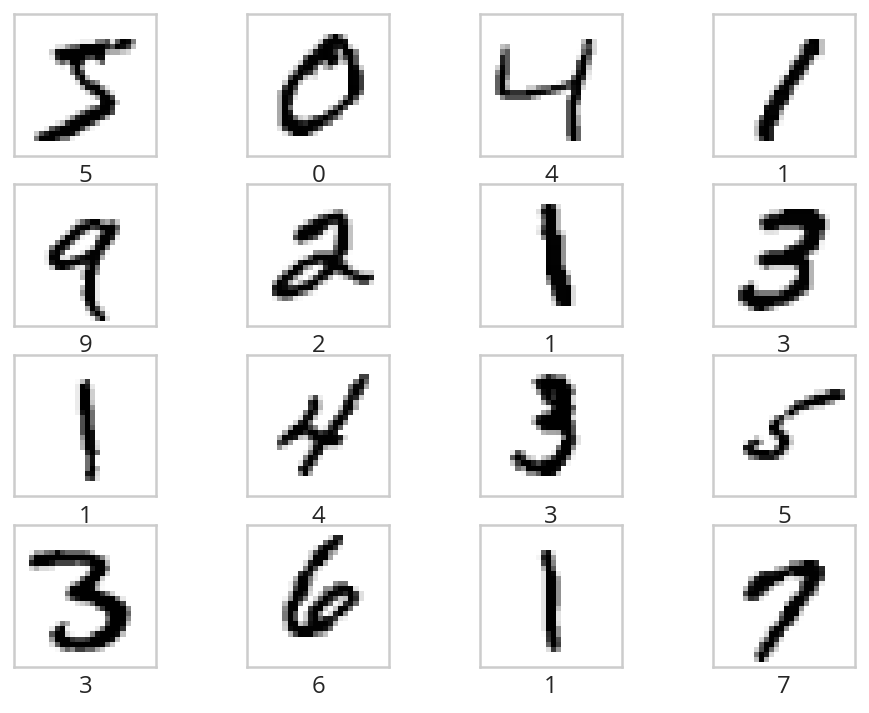
So the digits (at least the first 16) seem to be pretty clear.
Normalizing the Data
One problem we have, though, is that images use values from 0 to 255 to indicate the brightness of a pixel, but neural networks tend to work better with values from 0 to 1, so we'l have to scale the data back. The images are also 28 x 28 squares, but we need to transform them to flat vectors. We can change the shape of the input data using the numpy.reshape function, which takes the original data and the shape you want to change it to. In our case we want the same number of rows that there were originally and we want to reduce the images from 2-dimensional images to 1-dimensional images which we can do by passing in the number of total number of pixels in each image as a single number instead of width and height.
Since we have to do this for both the training and testing data I'll make a helper function.
def normalize(data: numpy.array) -> numpy.array:
    """reshapes the data and scales the values"""
    rows, width, height = data.shape
    pixels = width * height
    data = numpy.reshape(data, (rows, pixels))

    assert data.shape == (rows, pixels)

    MAX_BRIGHTNESS = 255
    data = data / MAX_BRIGHTNESS

    assert data.max() == 1
    assert data.min() == 0
    return data
x_train = normalize(x_train)
x_test = normalize(x_test)
The Neural Network Model
Build and Train It
Now we'll build the model. It's going to be a simple fully-connected network with three layers (input, hidden, output). To make the visualization simpler we'll use the sigmoid activation function.
Besides the shallowness of the model it's also going to be relatively simple, with only 32 nodes in the hidden layer.
First we'll build it as a Sequential (linear stack) model.
rows, pixels = x_train.shape
HIDDEN_NODES = 32
CATEGORIES = len(labels)
ACTIVATION = "sigmoid"
OUTPUT_ACTIVATION = "softmax"

model = tensorflow.keras.models.Sequential([
    tensorflow.keras.layers.Dense(HIDDEN_NODES,
                                  activation=ACTIVATION,
                                  input_shape=(pixels,)),
    tensorflow.keras.layers.Dense(HIDDEN_NODES,
                                  activation=ACTIVATION),
    tensorflow.keras.layers.Dense(CATEGORIES,
                                  activation=OUTPUT_ACTIVATION)
])
Now we can compile the model using a sparse categorical cross-entropy loss function, which is for the case where you have more than one category (non-binary) and the Adam optimizer.
model.compile(loss='sparse_categorical_crossentropy',
              optimizer='adam',
              metrics=['accuracy'])
And next we'll train the model by calling its fit method.
NO_OUTPUT = 0
EPOCHS = 40
BATCH_SIZE = 2048

history = model.fit(
    x_train, y_train,
    validation_data=(x_test, y_test),
    epochs=EPOCHS, batch_size=BATCH_SIZE,
    verbose=NO_OUTPUT
)
Plot the Training History
history = pandas.DataFrame.from_dict(history.history)
history = history.rename(
    columns={
        "loss": "Training Loss",
        "accuracy": "Training Accuracy",
        "val_loss": "Validation Loss",
        "val_accuracy": "Validation Accuracy",
    })
hover = HoverTool(
    tooltips=[
        ("Metric", "$name"),
        ("Epoch", "$x"),
        ("Value", "$y")
    ]
)

plot = history.hvplot().opts(
    height=800,
    width=1000,
    title="Training History",
    tools=[hover]
)
output = Embed(plot=plot, file_name="training_history")
output()
for column in history.columns:
    lowest = history[column].min()
    highest = history[column].max()
    print(f"({column}) Min={lowest:0.2f} Max={highest: 0.2f}")
(Training Loss) Min=0.20 Max= 2.26
(Training Accuracy) Min=0.22 Max= 0.95
(Validation Loss) Min=0.21 Max= 2.14
(Validation Accuracy) Min=0.38 Max= 0.94
So our validation accuracy goes from 38 % to 94%, which isn't bad, especially when you consider what a simple model we have.
Save It
Now we can save the model to use in our flask application.
Note To Self: Since this is being run on a remote machine, both the .env file and the directory to save the models refers to the remote machine, not the local machine where this file is being edited so you have to copy it to the local machine later on to use it with flask.
Also note that the you can't see the name since I put it in a .env file but it has .h5 as the extension. According to the TensorFlow page on saving and loading a model, H5 is the older format, they've switched to the SavedModel format, you lose some information that would help you resume training, but we're not going to do that anyway, and the H5 format should be a little smaller.
Most of the next blob is to make sure the folder for the model exists. I put it in the environment variable mostly because I keep changing my mind as to where to put it and what to call it.
base = "flask_tensorflow_mnist"
MODELS = Path(os.environ[base]).expanduser()
MODEL_NAME = os.environ[f"{base}_model"]
if not MODELS.is_dir():
    MODELS.mkdir(parents=True)
assert MODELS.is_dir()
MODEL_PATH = MODELS/MODEL_NAME
model.save(MODEL_PATH)
assert MODEL_PATH.is_file()
The Web Page
- Back-End (The Model Server)
- Tests
- Fixtures
These are the pytest fixtures to make it easier to create objects.
 # python
 from argparse import Namespace

 # from pypi

 import pytest
 import tensorflow

 # software under test
 from ml_server import app


 class Katamari:
     """Something to stick things into"""


 @pytest.fixture
 def katamari() -> Katamari:
     return Katamari()


 @pytest.fixture
 def client():
     """generates the flask client for testing"""
     app.config["TESTING"] = True
     with app.test_client() as client:
         yield client
     return


 @pytest.fixture
 def mnist():
     """Gets the test labels"""
     MAX_BRIGHTNESS = 255
     _, (x_test, y_test) = tensorflow.keras.datasets.mnist.load_data()
     return Namespace(
         x_test=x_test/MAX_BRIGHTNESS,
         y_test=y_test,
     )
- Features
These are the feature files.
 Feature: A Prediction Getter

 Scenario: The root page is retrieved
   Given a connection to the flask client
   When the root page is retrieved
   Then it has the expected text

 Scenario: A prediction is retrieved
   Given the get_prediction function
   When a prediction is retrieved
   Then it has the correct tuple

 Scenario: The API end-point is retrieved
   Given a connection to the flask client
   When the API end-point is retrieved
   Then the response has the expected JSON
- The Tests
These are the actual test functions.
 # python
 from http import HTTPStatus

 import random

 # pypi
 from expects import (
     be,
     be_true,
     contain,
     equal,
     expect,
 )

 from pytest_bdd import (
     given,
     when,
     then,
     scenario,
     scenarios,
 )

 import numpy

 # for testing
 from fixtures import client, katamari, mnist

 # software under test
 from ml_server import get_prediction, PATHS

 scenarios("get_predictions.feature")

 # ***** Get Root Page ***** #
 # Scenario: The root page is retrieved


 @given("a connection to the flask client")
 def setup_client(katamari, client):
     # this is a no-op since I made a fixture to build the client instead
     return


 @when("the root page is retrieved")
 def get_root_page(katamari, client):
     katamari.response = client.get(PATHS.root)
     expect(katamari.response.status_code).to(equal(HTTPStatus.OK))
     return

 @then("it has the expected text")
 def check_root_text(katamari):
     expect(katamari.response.data).to(
         contain(b"This is the Neural Network Visualizer"))
     return

 # ***** get predictions ***** #
 # *** Call the function *** #
 # Scenario: A prediction is retrieved

 @given("the get_prediction function")
 def check_get_prediction():
     """Another no-op"""
     return

 @when("a prediction is retrieved")
 def call_get_prediction(katamari, mocker):
     choice_mock = mocker.MagicMock()
     katamari.index = 6
     choice_mock.return_value = katamari.index
     mocker.patch("ml_server.numpy.random.choice", choice_mock)
     katamari.output = get_prediction()
     return


 @then("it has the correct tuple")
 def check_predictions(katamari, mnist):
     # Our model emits a list with one array for each layer of the model
     expect(type(katamari.output[0])).to(be(list))
     expect(len(katamari.output[0])).to(equal(3))

     # the last layer is the prediction layer
     predictions = katamari.output[0][-1]

     predicted = predictions.argmax()
     expected = mnist.y_test[katamari.index]
     expect(predicted).to(equal(expected))

     # now check the image
     expected = mnist.x_test[katamari.index]
     # expect(katamari.output[1].shape).to(equal((28, 28)))
     expect(numpy.array_equal(katamari.output[1], expected)).to(be_true)
     return

 # *** API Call *** #
 #Scenario: the API end-point is retrieved
 #  Given a connection to the flask client


 @when("the API end-point is retrieved")
 def get_predictions(katamari, client, mocker):
     # set up the mock so we can control which of the images it tries to predict
     choice_mock = mocker.MagicMock()

     mocker.patch("ml_server.numpy.random.choice", choice_mock)

     katamari.index = random.randrange(100)
     choice_mock.return_value = katamari.index

     katamari.response = client.get(PATHS.api)
     expect(katamari.response.status_code).to(equal(HTTPStatus.OK))
     return


 @then("the response has the expected JSON")
 def check_response(katamari, mnist):
     expect(katamari.response.is_json).to(be_true)
     data = katamari.response.json
     layers = data["prediction"]

     # the prediction should be the three outputs of our model
     # except with lists instead of numpy arrays
     expect(type(layers)).to(be(list))
     expect(len(layers)).to(equal(3))
     prediction = numpy.array(layers[-1])

     # now check that it made the expected prediction
     predicted = prediction.argmax()
     expected = mnist.y_test[katamari.index]
     expect(predicted).to(equal(expected))

     # and that it gave us the right image
     expected = mnist.x_test[katamari.index]
     expect(numpy.array_equal(numpy.array(data["image"]), expected)).to(be_true)
     return
- Fixtures
- The Implementation
This is where we tangle out a file to run a flask server that will serve up our model's predictions.
 <<ml-server-imports>>

 <<ml-server-flask-app>>


 <<ml-server-load-model>>

 <<ml-server-feature-model>>

 <<ml-server-load-data>>


 <<ml-server-get-prediction>>


 <<ml-server-index>>

 <<ml-server-api>>

 <<ml-server-main>>
First up is our imports. Other than Flask there really isn't anything new here.
 # python
 from argparse import Namespace
 import json
 import os
 import random
 import string

 from pathlib import Path

 # pypi
 import numpy
 import tensorflow

 from dotenv import load_dotenv
 from flask import Flask, request
Now we create the flask app and something to hold the paths.
 app = Flask(__name__)

 PATHS = Namespace(
     root = "/",
     api = "/api",
 )
Next we'll load the saved model. I'm going to break this up a little bit just because I wasn't clear about what was going on originally.
 load_dotenv(override=True)

 base = "flask_tensorflow_mnist"
 MODELS = Path(os.environ[base]).expanduser()
 MODEL_NAME = os.environ[f"{base}_model"]
 assert MODELS.is_dir()
 MODEL_PATH = MODELS/MODEL_NAME
 assert MODEL_PATH.is_file()

 model = tensorflow.keras.models.load_model(MODEL_PATH)
At this point we should have a re-loaded version of our trained model (minus some information as noted above because it was saved using the
H5format). Our model has one output layer - the softmax prediction layer - which gives the probabilities that an input image is one of the ten digits, but since we want to see what each layer is doing, we'll create a new model with the output from each layer added to the outputs - so since we have three layers in the model we'll now have three outputs.feature_model = tensorflow.keras.models.Model( inputs=model.inputs, outputs=[layer.output for layer in model.layers])
Next let's load and normalize the data. We don't use the training data or the labels here.
 MAX_BRIGHTNESS = 255

 _, (x_test, _) = tensorflow.keras.datasets.mnist.load_data()
 x_test = x_test/MAX_BRIGHTNESS
Now we create the function to get the prediction for an image. It also returns the image so that we can see what it was.
 ROWS, HEIGHT, WIDTH = x_test.shape
 PIXELS = HEIGHT * WIDTH

 def get_prediction() -> (list, numpy.array):
     """Gets a random image and prediction

     The 'prediction' isn't so much the value (e.g. it's a 5) but rather the
     outputs of each layer so that they can be visualised. So the first value
     of the tuple will be a list of arrays whose length will be the number of
     layers in the model. Each array will be the outputs for that layer.

     This always pulls the image from =x_test=.

     Returns:
      What our model predicts for a random image and the image
     """
     index = numpy.random.choice(ROWS)
     image = x_test[index,:,:]
     image_array = numpy.reshape(image, (1, PIXELS))
     return feature_model.predict(image_array), image
Next we create the handler for the REST calls. If you make a GET request from the root you'll get an HTML page back.
 @app.route(PATHS.root, methods=['GET'])
 def index():
     """The home page view"""
     return "This is the Neural Network Visualizer (use /api for the API)"
If you return a dict flask will automatically identify it as JSON.
 @app.route(PATHS.api, methods=["GET"])
 def api():
     """the JSON view

     Returns:
       JSON with prediction layers and image
     """
     predictions, image = get_prediction()

     # JSON needs lists, not numpy arrays
     final_predictions = [prediction.tolist() for prediction in predictions]
     return {"prediction": final_predictions,
             'image': image.tolist()}
And now we make the "main" entry point.
 if __name__ == "__main__":
     app.run()
To run this you would enter the same directory as the
ml_server.pyfile and execute:python ml_server.py
Or better, use the development server.
set -X FLASK_APP ml_server
set -X FLASK_ENV development

flask run
This will automatically re-load if you make changes to the code. The first two lines in the code block above tell flask which one of the modules has the flask-app and also that it should run in development mode. I'm using the Fish Shell, so if you are using bash or a similar shell instead the lines would be this instead.
export FLASK_APP=ml_server
export FLASK_ENV=development

flask run
- Tests
- Front-End
- Tests
<<front-end-feature-title>>

<<front-end-click>>
# python
from argparse import Namespace

# pypi
from selenium import webdriver

import pytest


@pytest.fixture
def browser():
    """Creates the selenium webdriver session"""
    browser = webdriver.Firefox()
    yield browser
    browser.close()
    return


CSSSelectors = Namespace(
    main_title = ".main h1",
    main_button = ".main button",
    sidebar_title = ".sidebar h1",
    sidebar_image = ".sidebar-content img",
    )

class HomePage:
    """A page-class for testing

    Args:
     address: the address of the streamlit server
     wait: seconds to implicitly wait for page-objects
    """
    def __init__(self, address: str="http://localhost:8501",
                 wait: int=1) -> None:
        self.address = address
        self.wait = wait
        self._browser = None
        return

    @property
    def browser(self) -> webdriver.Firefox:
        """The browser opened to the home page"""
        if self._browser is None:
            self._browser = webdriver.Firefox()
            self._browser.implicitly_wait(self.wait)
            self._browser.get(self.address)
        return self._browser

    @property
    def main_title(self) -> webdriver.firefox.webelement.FirefoxWebElement:
        """The object with the main title"""
        return self.browser.find_element_by_css_selector(
                CSSSelectors.main_title
            )

    @property
    def main_button(self) -> webdriver.firefox.webelement.FirefoxWebElement:
        """The man button"""
        return self.browser.find_element_by_css_selector(
                CSSSelectors.main_button
            )


    @property
    def sidebar_title(self) -> webdriver.firefox.webelement.FirefoxWebElement:
        """The sidebar title element"""
        return self.browser.find_element_by_css_selector(
                CSSSelectors.sidebar_title
            )

    @property
    def sidebar_image(self) -> webdriver.firefox.webelement.FirefoxWebElement:
        """This tries to get the sidebar image element
       """
        return self.browser.find_element_by_css_selector(
            CSSSelectors.sidebar_image)

    def __del__(self):
        """Finalizer that closes the browser"""
        if self._browser is not None:
            self.browser.close()
        return


@pytest.fixture
def home_page():
    return HomePage()
 <<test-front-imports>>

 <<test-front-text>>

 <<test-front-click>>
- The Features
We can start with the imports and basic set up.
 # pypi
 from expects import (
     be_true,
     equal,
     expect
 )

 from pytest_bdd import (
     given,
     scenarios,
     then,
     when,
 )

 # fixtures
 from fixtures import katamari

 from front_end_fixtures import home_page

 and_also = then
 scenarios("front_end.feature")
- The Initial Text
 Feature: The GUI web page to view the model

 Scenario: The user goes to the home page and checks it out
   Given a browser on the home page
   When the user checks out the titles and button
   Then they have the expected text
# ***** The Text ***** #
# Scenario: The user goes to the home page and checks it out


@given("a browser on the home page")
def setup_browser(katamari, home_page):
    # katamari.home_page = home_page
    return


@when("the user checks out the titles and button")
def get_text(katamari, home_page):
    katamari.main_title = home_page.main_title.text
    katamari.button_text = home_page.main_button.text
    katamari.sidebar_title = home_page.sidebar_title.text
    return


@then("they have the expected text")
def check_text(katamari):
    expect(katamari.main_title).to(equal("Neural Network Visualizer"))
    expect(katamari.button_text).to(equal("Get Random Prediction"))
    expect(katamari.sidebar_title).to(equal("Input Image"))
    return
- Click the Button
Scenario: The user gets a random prediction
  Given a browser on the home page
  When the user clicks on the button
  Then the sidebar displays the input image
# ***** The button click ****** #
# Scenario: The user gets a random prediction
#  Given a browser on the home page


@when("the user clicks on the button")
def click_get_image_button(home_page):
    home_page.main_button.click()
    return


@then("the sidebar displays the input image")
def check_sidebar_sections(home_page):
    expect(home_page.sidebar_image.is_displayed()).to(be_true)
    return
- The Initial Text
- Streamlit
For the front-end we'll use Streamlit, a python library to make creating web-pages for certain types of applications more easily (I think, I'll need to check it out more later).
 <<streamlit-imports>>

 <<streamlit-url>>

 <<streamlit-title>>

 <<streamlit-sidebar>>

 <<streamlit-control>>
First the imports.
 # python
 import json
 import os
 from urllib.parse import urljoin

 # pypi
 import requests
 import numpy
 import streamlit
 import matplotlib.pyplot as pyplot

 # this code
 from ml_server import PATHS
Now we'll setup the URL for our flask backend - as you can see we're expecting to run this on the
localhostaddress, you'd have to change this for make it available outside the host PC.URI = urljoin("http://127.0.0.1:5000/", PATHS.api)
Next we'll set the title for the page - this can be a little confusing, although it's called the title, it isn't the HTML title but rather the main heading for the page.
streamlit.title('Neural Network Visualizer')
Now we'll add a collapsible sidebar where we'll eventually put our image output and add a headline for it (
Input Image).streamlit.sidebar.markdown('# Input Image')
Now we'll add some logic. I think this would be the
controlportion of a more traditional web-server. It's basically where we react to a button press by getting a random image and visualizing how it makes a prediction.# create a button and wait for someone to press it if streamlit.button("Get Random Prediction"): # Someone pressed the button, make an API call to our flask server response = requests.get(URI) # convert the response to a dict response = response.json() # get the prediction array predictions = response.get('prediction') # get the image we were making the prediction for image = response.get('image') # the image # streamlit expects a numpy array or string-like object, not lists image = numpy.array(image) # show the image in the sidebar streamlit.sidebar.image(image, width=150) # iterate over the prediction for each layer in the model for layer, prediction in enumerate(predictions): # convert the prediction list to an array # and flatten it to a vector numbers = numpy.squeeze(numpy.array(prediction)) pyplot.figure(figsize=(32, 4)) rows = 1 if layer == 2: # this is the output layer so we only want one row # and we want 10 columns (one for each digit) columns = 10 else: # this is the input or hidden layer # since our model had 32 hidden nodes it has 32 columns # the original version had 2 rows and 16 columns, but # while that looked nicer, I think it makes more sense for # there to be one layer columns = 32 for index, number in enumerate(numbers): # add a subplot to the figure pyplot.subplot(rows, columns, index + 1) pyplot.imshow((number * numpy.ones((8, 8, 3))) .astype('float32'), cmap='binary') pyplot.xticks([]) pyplot.yticks([]) if layer == 2: pyplot.xlabel(str(index), fontsize=40) pyplot.subplots_adjust(wspace=0.05, hspace=0.05) pyplot.tight_layout() streamlit.text('Layer {}'.format(layer + 1), ) streamlit.pyplot()
- Tests