Note on the Analysis of Ordered Categorical Data
Write your post here.
Write your post here.
This freecodecamp article has some references to python stuff the author likes. Not all of it is of interest to me, but some of it is, so this is just my dump of the links I like.
geopy allows you to use python to find out geographic information for locations. It provides a common front end for different services like Google Maps, Bing, etc.
inspect is a python built-in that helps you take advantage of python's introspection features. Besides looking at other people's code, it shows you how well (or not) you are providing information for other coders using your code.
I haven't actually used newspaper but it looks interesting.
sh is a subprocess replacement. I've always been kind of leery about using python to run shell commands, but this at least makes it look nicer.
Although wikipedia is one of the classic web-scraping examples, there's actually a python library to pull articles more directly.
One of the problems of relying on search engines is that the more obscure the subject you are interested in, the greater the chance that what you'll get will be either unlocatable or outdated. These are my notes on setting up the ubertooth on an ubuntu system in September of 2018, which turned out to be a slightly different experience from what I went through earlier in this year so I thought I should try and make a record of it somewhere.
The current release for the Ubertooth firmware and code is 2018-08-R1. Download the ubertooth-2018-08-R1.tar.xz file from that page and untar it. You will also want the matching libbtb code.
For some reason the instructions on the home page assume you already have the code built and installed, but there's actually some previous steps you need to do.
sudo apt install cmake libusb-1.0-0-dev make gcc g++ libbluetooth-dev \
pkg-config libpcap-dev python-numpy python-pyside python-qt4
The python-<packages> can be downloaded from pip, and you really don't need the pyside and qt4 libraries unless you want to run the spectral scanner, which is kind of their hello-world, which is nice, but the pyside code is actually depracated because qt5 is the current version and it won't work with python 3.6 (the current ubuntu default) so I personally would skip it. numpy is always a good idea no matter what you end up doing.
libbtb is the Bluetooth Baseband Library which you need for ubertooth to decode bluetooth packets. Change into the folder you downloaded earlier and build and install it.
mkdir build
cd build
cmake ..
make
sudo make install
[ 88%] Built target btbb
[ 88%] Built target btaptap
[100%] Built target pcapdump
Install the project...
-- Install configuration: ""
-- Installing: /usr/local/lib/pkgconfig/libbtbb.pc
-- Installing: /usr/local/lib/libbtbb.so.1.0
-- Installing: /usr/local/lib/libbtbb.so.1
-- Installing: /usr/local/lib/libbtbb.so
-- Installing: /usr/local/include/btbb.h
running build
running build_py
running install
running install_lib
creating //usr/local/lib/python2.7/site-packages/pcapdump
copying /home/dogen/Downloads/libbtbb-2018-08-R1/build/python/pcaptools/build/lib.linux-x86_64-2.7/pcapdump/pcapdump.py -> //usr/local/lib/python2.7/site-packages/pcapdump
copying /home/dogen/Downloads/libbtbb-2018-08-R1/build/python/pcaptools/build/lib.linux-x86_64-2.7/pcapdump/__init__.py -> //usr/local/lib/python2.7/site-packages/pcapdump
byte-compiling //usr/local/lib/python2.7/site-packages/pcapdump/pcapdump.py to pcapdump.pyc
byte-compiling //usr/local/lib/python2.7/site-packages/pcapdump/__init__.py to __init__.pyc
running install_egg_info
Writing //usr/local/lib/python2.7/site-packages/pcapdump-0.0.0-py2.7.egg-info
-- Installing: /usr/local/bin/btaptap
Now run ldconfig.
sudo ldconfig
Do the same thing to build the tools. First untar the file you downloaded, change into the host folder (ubertooth-2018-08-R1/host) and build and install the code.
mkdir build
cd build/
cmake ..
make
sudo make install
sudo ldconfig
You should now have some command-line tools that start with ubertooth- (e.g. ubertooth-rx).
You can use setcap to make it so that you don't need to run things as root. This is how to make it so you can run ubertooth-scan.
sudo setcap 'CAP_NET_RAW+eip CAP_NET_ADMIN+eip' (which ubertooth-scan)
One of the commands installed in the previous step was ubertooth-dfu which is the Do Firmware Update command that we need to update the firmware. First insert the ubertooth USB dongle, then change into the ubertooth-2018-08-R1/ubertooth-one-firmware-bin folder and run the update command.
Warning: According to the documentation you need to make sure to have an antenna on the ubertooth before inserting it. Also, it too a couple of attempts inserting, removing, and re-inserting the ubertooth before it worked for some reason (you can tell it's ready when there are two green LEDs and one red LED lit up).
ubertooth-dfu -d bluetooth_rxtx.dfu -r
As I mentioned before, the GUI for the spectral analysis is out of date and didn't install in my setup, but you can check that the ubertooth is working by just running the spectral analysis without a GUI.
ubertooth-specan
This should send a timestamp, frequency, RSSI CSV to stdout as the ubertooth sweeps the channels and shows the amount of electromagnetic radiation it sees on each.
Since we can't run the python spectrum analyzer, we should turn to a better alternative, spectools. This was a project to mostly re-create the metageek wi-spy GUI but it supports the ubertooth. It actually looks like a dead project (the last News item on their site was from 2012), but it works for now. Luckily ubuntu has this in the repositories so you should be able to just install it with apt.
sudo apt install spectools
Once you install it you can either run spectool_curses which will run at the command line but only has one view, or spectool_gtk which will run in an X-windows environment and show three views of the 2.4 GHz spectrum.
Now we come to the interesting installation. At this point you probably have all the command-line utilities you need, but kismet provides a convenient interface to start capturing packets. Unfortunately it is going through a major upgrade which makes it incompatible with the ubertooth plugin for it (maybe, there's two plugins and one of them might work, but they don't seem to document it (or much else, for that matter)).
Note: This post is from 2018. I no longer use the Arlo and have been told that what I have here no longer works. This is here for my personal history (and to remind myself how whiny (and unfair) I can be when frustrated).
I came home the other day to find some things from my garage outside on the driveway. The garage door was closed but the bolt wasn't in place, so I guess I forgot to secure it and someone went in while I was at work. I have two Arlo security cameras, one pointing at my front lawn and one at my back (I just took the ones I had set up to catch intruders and pointed them outside so they aren't really set up correctly) and they are supposed to send me notifications when motion is detected, but I didn't recall seeing any, but then I looked at my phone and I had missed one earlier in the day, and when I looked at it there was a video showing someone standing outside my back door, but that was all, but I have a Continuous Video Recording (CVR) subscription so I decided to poke around, that's when I found out how horrible Arlo's CVR really is.
The first problem with the Arlo's CVR system is that it's not always reliable. I've had cameras randomly stop recording videos on the server and the only "fix" that the help desk was able to give me was to deauthorize and reauthorize them (and in some cases completely remove them from the base-station and re-add them). This seems to work, but whenever you deauthorize a camera the server dumps all your recordings, so if you think you want to save something you'll have to do that first or it won't be there when the camera gets re-authorized. But then if you try to save something you'll find that the Arlo doesn't provide a way to download the video. The work-around you'll find on the forums is to do a screen capture while it plays - a horrible system, especially since the flash interface is pretty flaky and doesn't always work on my PC.
Then there's a secondary problem in that it's recording twenty-four hours a day - and they don't have a fast-forward button. They do have a timeline that you can click on to jump around, not only does this mean you might be jumping past events you want, but they don't really have a 'streaming' interface in the sense that Netflix or some other streaming service does where they're downloading small chunks so you don't have to wait a long time for the play to resume, instead the Arlo seems to be downloading one minute at a time so you have these really long waits, and the precision of the timeline isn't very good so you'll probably have to search a little bit just to find what you want.
There's also another problem, which is that the user-interface's timeline isn't accurate, so even if you know the time of an event, you can't use the time in the interface to find it. In my case the bit that was captured on my phone showing the trespasser gave me a time, and there was a little blue dot on the timeline showing that there was an event at that time, but there was nothing in the video. It turned out that the video for the camera I had out back was shifted fifty-five minutes into the future, which was even more confusing because the time for the camera I had in front wasn't shifted (that I know of) so when I looked at the video for the front around that time I was able to see the prowler arriving.
But even once I found the places in the CVR that showed the prowler (I didn't have it pointing at my garage so I didn't see him actually doing anything other than probing (knocking and then trying to open the doors)) I still had the problem of how to get the video before Netgear decided to break again and I lost it all. This is where python came in.
It turns out that even though netgear hasn't published an official API for the Arlo, some people (like this guy) have reverse-engineered the API and there are several python-based libraries on github that help you talk to the arlo. This one, by jeffreydwalter was the one that I saw that helped with downloading the CVR videos so it's the one that I went with. It's on pypi, but the commit that added CVR support was made a month ago and I wasn't sure when the pypi code was uploaded so I decided to install it from the master branch, since I was going to use the example code to start my code anyway - by this I mean I had to pull the repository anyway, so I used the setup.py file to install it (in developer mode in case it changes).
The following code is basically what you can find in the example that comes with the repository called arlo-cvrdownload.py re-written to have a command-line interface and match my coding style more.
# python standard library
from pathlib import Path
import argparse
import datetime
import os
import re
import sys
# from pypi
import dateparser
import requests
from Arlo import Arlo
from dotenv import load_dotenv
In order to use the API you need to have a Netgear account and you have to pass it to the server. To prevent putting the credentials in the code, I'll use python-dotenv. In order to use it I created a file named config.arlo with the information so I can load it.
class Configuration:
    """Loads the credentials and other info for the Arlo

    Args:
     config_path (str): path to the configuration for the arlo
     verbose (bool): emit more messages
    """
    def __init__(self, config_path="~/.config/arlo/config.arlo",
                 verbose=False):
        self.verbose = verbose
        self._config_path = None
        self.config_path = config_path
        self._username = None
        self._password = None
        self._front_camera = None
        self._back_camera = None
        self._kitchen_camra = None
        return

    @property
    def config_path(self):
        """the path to the configuration"""
        return self._config_path
dotenv works by adding the values in the configuration file into the environment dictionary. Most of the convenience of it comes if you create a .env file at the base of your repository, in which case it will automatically find it for you, but even though I'm not doing that it still saves me from parsing the file myself, so I'll use it. Since the other properties (username and password) rely on the values already being in the dictionary I'm calling load_dotenv in the config_path setter so that it's there before they get used.
@config_path.setter
def config_path(self, path):
    """Path to the credentials file

    Side-Effect:
     loads the configuration into the environment

    Args:
     path(str): path to the file
    """
    self._config_path = Path(path).expanduser()
    load_dotenv(dotenv_path=self.config_path)
    if self.verbose:
        print("Loaded config from {}".format(self._config_path))
    return
This is the rest of the methods for the Credentials class. Org-mode pushes it flush-left on export so it looks like it is missing whitespace, but it's there in the code.
@property
def username(self):
    """The netgear login username

    Raises:
     Exception: no username found
    """
    if self._username is None:
        self._username = os.getenv("username")
        if not self._username:
            raise Exception("Username not found")
    return self._username

@property
def password(self):
    """The netgear login password

    Raises:
     Exception: no password found
    """
    if self._password is None:
        self._password = os.getenv("password")
        if not self._password:
            raise Exception("Password not found")
    return self._password

@property
def front_camera(self):
    """The index for the front camera

    Returns:
     index (int): the index for the front camera in the camera list

    Raises:
     Exception: something bad happened
    """
    if self._front_camera is None:
        try:
            self._front_camera = int(os.getenv("front_camera"))
        except (TypeError, ValueError) as error:
            raise Exception("Invalid front camera")
    return self._front_camera

@property
def back_camera(self):
    """the index for the back camera"""
    if self._back_camera is None:
        try:
            self._back_camera = int(os.getenv("back_camera"))
        except Exception:
            print("invalid back camera")
            raise
    return self._back_camera

@property
def kitchen_camera(self):
    """index for the kitchen"""
    if self._kitchen_camera is None:
        try:
            self._kitchen_camera = int(os.getenv("kitchen_camera"))
        except Exception:
            print("invalid kitchen camera")
            raise
    return self._kitchen_camera
Python 3.4 added a Path class to create an object-oriented version of what os.path does (along with some other stuff). You don't need it but I like it. My command-line interface actually doesn't support the sub-folder so it mostly just makes sure the folder is there. The Paths class here is to help set up the directories for the video output files.
class Paths:
    """Paths for the output

    Args:
     root (str): path to the folder
     verbose (bool): whether to emit more messages
    """
    def __init__(self, root=".", verbose=False):
        # warning: the 'root' setter uses self.verbose
        # so set it before setting self.root
        self.verbose = verbose
        self._root = None
        self.root = root
        return

    @property
    def root(self):
        """path to the folder"""
        return self._root

    @root.setter
    def root(self, path):
        """path to put the files in"""
        if self._root is None:
            self._root = Path(path)
            self._root.mkdir(parents=True, exist_ok=True)
            if self.verbose:
                print("Root Video Path: {}".format(self._root))
        return self._root

    def add_subfolder(self, sub):
        """adds the root to the sub

        creates the sub-folder if it doesn't exist

        Args:
         sub(str): subfolder name

        Returns:
         path: path object for the sub-directory
        """
        path = self.root.joinpath(sub)
        path.mkdir(parents=True, exist_ok=True)
        if self.verbose:
            print("subfolder: {}".format(path))
        return path
This is the class to actually do the downloading. It essentially does what the example does but I like it to be both smaller and more verbose so this matches my style more.
class Downloader:
    """Downloads the videos

    Args:
     camera (int): index of the camera to grab the files for
     start (str): date and time for the start of the videos
     end (str): date and time for the end of the videos
     path: object with the path for folders to store
     configuration: object with configuration information about the arlo
     output_timestamp(str): how to timestamp the files saved
     verbose (bool): emit more messages
    """
    date_format = "%Y%m%d"
    video_url = re.compile("^http.+(?P<camera>[A-Z0-9]{13})"
                           "_[0-9]{13}_"
                           "(?P<timestamp>[0-9]{13})")

    def __init__(self, camera, start, end, path,
                 configuration,
                 output_timestamp="%Y-%m-%d_%H_%M_%S",
                 verbose=False,
                 ):
        self.camera = camera
        self.start = start
        self.end = end
        self.path = path
        self.output_timestamp = output_timestamp
        self.verbose = verbose
        self.configuration = configuration
        self._start_time = None
        self._end_time = None
        self._start_date = None
        self._end_date = None
        self._arlo = None
        self._basestations = None
        self._cameras = None
        self._playlist = None
        return

    @property
    def start_time(self):
        """Starting time for the videos

        Returns:
         time (datetime.datetime): the starting time of videos to pull
        """
        if self._start_time is None:
            self._start_time = dateparser.parse(self.start)
            if self.verbose:
                print("Start Time: {}".format(self._start_time))
        return self._start_time

    @property
    def end_time(self):
        """ending time for the videos

        Returns:
         time (datetime.datetime): ending time of videos to pull
        """
        if self._end_time is None:
            self._end_time = dateparser.parse(self.end)
            if self.verbose:
                print("End Time: {}".format(self._end_time))
        return self._end_time

    @property
    def start_date(self):
        """The start date for the playlist

        Returns:
         start-date (`string`): starting date for the recordings
        """
        if self._start_date is None:
            self._start_date = self.start_time.strftime(self.date_format)
            if self.verbose:
                print("Start Date: {}".format(self._start_date))
        return self._start_date

    @property
    def end_date(self):
        """end-date for the playlist

        Returns:
         end-date (`str`): end-date for the recordings
        """
        if self._end_date is None:
            self._end_date = self.end_time.strftime(self.date_format)
            if self.verbose:
                print("End Date: {}".format(self._end_date))
        return self._end_date

    @property
    def arlo(self):
        """The Arlo object

        Instantiating the Arlo object automatically calls Login(), which
        returns an oAuth token that gets cached. Subsequent successful calls
        to login will update the oAuth token

        Returns:
         Arlo: thing to talk to the arlo
        """
        if self._arlo is None:
            self._arlo = Arlo(self.configuration.username,
                              self.configuration.password)
            if self.verbose:
                print("Arlo created")
        return self._arlo

    @property
    def basestations(self):
        """This next part was in the original code but not used

        I'm leaving it in on the chance that it might be needed for the
        side-effects

        Gets the list of devices and filter on device type to only get
        the basestation.
        This will return an array which includes all of the basestation's
        associated metadata.

        Returns:
         list: list of basestations
        """
        if self._basestations is None:
            self._basestations = self.arlo.GetDevices('basestation')
            if self.verbose:
                print("Base Stations retrieved")
        return self._basestations

    @property
    def cameras(self):
        """Get the camera.

        Returns:
          array: the camera's metadata
        """
        if self._cameras is None:
            self._cameras = self.arlo.GetDevices('camera')
            if self.verbose:
                print("Cameras retrieved")
        return self._cameras

    @property
    def playlist(self):
        """the recordings within our date-range

        Raises:
         SystemExit: no playlist for the dates was found
        """
        if self._playlist is None:
            if self.verbose:
                print("Getting Playlist")
            self._playlist = self.arlo.GetCvrPlaylist(
                self.cameras[self.camera],
                self.start_date,
                self.end_date)
            self._playlist = self._playlist["playlist"]
            if not self._playlist:
                sys.exit(
                    ("No playlist found for camera"
                     " {} from {} through {}").format(
                         self.camera,
                         self.start_date,
                         self.end_date,
                     ))
        return self._playlist
This does the actual downloading. It downloads some m3u8 files and then pulls the files that they refer to. m3u8 (MP3 URL with UTF-8 encoding) is a format to list URLs or paths that point to media and is said to be popular (by Wikipedia) in Dynamic Adaptive Streaming over HTTP (although I don't think the arlo uses DASH).
def __call__(self):
    """Downloads the videos"""
    print("Downloading CVR videos from {} to {}".format(
        self.start, self.end))
    try:
        # the playlist values is a list of lists
        for playlist in self.playlist.values():
            # each 'playlist' is a list of dictionaries
            for recordings in playlist:
                m3u8 = requests.get(recordings["url"]).text.split("\n")
                for location in m3u8:
                    match = self.video_url.match(location)
                    if match:
                        camera_id = match.group("camera")
                        video_time = datetime.datetime.fromtimestamp(
                            int(match.group("timestamp")) // 1000)
                        if self.verbose:
                            print("Video Time: {}".format(video_time))
                        if self.start_time < video_time < self.end_time:
                            filename = (
                                camera_id
                                + '-'
                                + video_time.strftime(
                                    self.output_timestamp)
                                + '.mp4')

                            file_path = self.path.joinpath(filename)
                            if file_path.is_file():
                                print(
                                    ("Video {} already exists, "
                                     "not downloading.").format(filename))
                            else:
                                print('Downloading {}'.format(filename))
                                with file_path.open('wb') as writer:
                                    # Get video as a chunked stream.
                                    # StreamRecording returns a generator.
                                    for chunk in self.arlo.StreamRecording(
                                            location):
                                        writer.write(chunk)
                    elif self.verbose:
                        print("didn't match")
            self.arlo.Logout()
            print('Logged out')
    except Exception as e:
        print(e)
        self.arlo.Logout()
        print('Logged out')
    return
def main():
    parser = argparse.ArgumentParser()
    parser.add_argument("camera", help="location of the camera to use",
                        choices=["front", "back", "kitchen"])
    parser.add_argument("start", help="Time of earliest video to grab")
    parser.add_argument("end", help="Time of latest video to grab")
    parser.add_argument("--sub-folder", help="sub-folder to put the videos in",
                        default=".")
    parser.add_argument("--verbose", action="store_true",
                        help="Emit more messages")
    arguments = parser.parse_args()
    path = Paths(root=arguments.sub_folder, verbose=arguments.verbose)
    configuration = Configuration(verbose=arguments.verbose)
    camera = getattr(configuration, "{}_camera".format(arguments.camera))
    download = Downloader(camera=camera,
                          start=arguments.start,
                          end=arguments.end,
                          configuration=configuration,
                          path=path.root,
                          verbose=arguments.verbose)
    download()
    return
if __name__ == "__main__":
    main()
For a consumer product this seems like a lot of work to download videos, but I'm glad someone went to the trouble to build this to make up for Netgear's horrible user interface. The Arlo seems like some decent (although probably overpriced) hardware matched to some pretty bad software and nearly non-existent customer support or documentation and a not particularly robust web-service. I don't know that I would recommend it to anyone who wants more than a web-camera.
If you use underscores in org-mode it will treat them almost the way latex does, changing the text that immediately follows the underscore as a sub-string.
This:
before-the-underscore_aftertheunderscore
Is rendered as this:
before-the-underscoreaftertheunderscore
But sometimes you just want an underscore (especially if you are writing about python code).
I found the answer on Stack Overflow (of course) - you can add an #+OPTIONS directive to the file to disable this behavior. I originally went with the accepted answer which was to add #+OPTIONS: ^:nil, and it works in most cases, but then I couldn't figure out how to write this post, since the underscores stopped working and I didn't want to have to use MathJax to show what I meant (although maybe that wouldn't be so bad), so now I think the better answer is the one given by danielpoe in the comments - use #+OPTIONS: ^:{} instead. This disables the sub-scripting behavior of the underscore in most cases but allows you to add sub-scripting by putting the text following the underscore in curly-braces.
I wrote the example above, for instance, like this:
before-the-underscore_{aftertheunderscore}
This solution doesn't replicate the original org-mode behavior completely when you use the curly-braces. Without the directive if you have multiple underscores org-mode puts everything after the first underscore in the sub-string and removes all subsequent underscores, smashing the words together.
When I wrote this:
before-the-underscore_after_the_under_score
It came out as this:
before-the-underscoreaftertheunderscore
But the curly-braces keeps them:
before-the-underscoreafter_the_under_score
Which seems like an improvement anyway.
The only problem now is that I keep forgetting what to type in every time I want to use an underscore, which is why I'm making this post.
radvd (the router advertisement daemon) sends IPv6 advertisements and responds to node IPv6 requests. Here's the description from the man page.
radvd is the router advertisement daemon for IPv6. It listens to router solicitations and sends router advertisements as described in "Neighbor Discovery for IP Version 6 (IPv6)" (RFC 4861). With these advertisements hosts can automatically configure their addresses and some other parameters. They also can choose a default router based on these advertisements.
Setting radvd is suspiciously easy compared to other linux services. First you install it.
sudo apt install radvd
Installing it will also start the service so we can use systemctl to check how it's doing.
systemctl status radvd
systemctl status radvd
● radvd.service - LSB: Router Advertising Daemon
   Loaded: loaded (/etc/init.d/radvd; bad; vendor preset: enabled)
   Active: active (exited) since Fri 2018-07-20 12:39:19 PDT; 36s ago
     Docs: man:systemd-sysv-generator(8)

Jul 20 12:39:18 asgaard systemd[1]: Starting LSB: Router Advertising Daemon...
Jul 20 12:39:19 asgaard radvd[8532]: Starting radvd:
Jul 20 12:39:19 asgaard radvd[8532]: * /etc/radvd.conf does not exist or is empty.
Jul 20 12:39:19 asgaard radvd[8532]: * See /usr/share/doc/radvd/README.Debian
Jul 20 12:39:19 asgaard radvd[8532]: * radvd will *not* be started.
Jul 20 12:39:19 asgaard systemd[1]: Started LSB: Router Advertising Daemon.
You can see in the output that there's a line with /etc/radvd.conf does not exist or is empty.. To fix this we're going to create the configuration file.
Now create a configuration file (named radvd.conf). Here's an example.
interface eth0
{
MinRtrAdvInterval 3;
MaxRtrAdvInterval 4;
AdvSendAdvert on;
AdvManagedFlag on;
prefix 2001:db7::/64
{ AdvValidLifetime 14300; AdvPreferredLifetime 14200; }
;
};
Note that the interface name depends on your system. Most linux systems don't use the eth0 convention anymore. On my desktop the ethernet inteface is called enp1s0 and on my raspberry pi it's enxb827eb6c9129 so make sure you check what your interface name is using ifconfig.
Now move (or copy) the config file into /etc/
sudo mv radvd.conf /etc/
And then restart radvd and check its state.
sudo service radvd restart
systemctl status radvd
● radvd.service - LSB: Router Advertising Daemon
   Loaded: loaded (/etc/init.d/radvd; bad; vendor preset: enabled)
   Active: active (exited) since Fri 2018-07-20 12:41:36 PDT; 2s ago
     Docs: man:systemd-sysv-generator(8)
  Process: 10008 ExecStop=/etc/init.d/radvd stop (code=exited, status=0/SUCCESS)
  Process: 10017 ExecStart=/etc/init.d/radvd start (code=exited, status=0/SUCCESS)

Jul 20 12:41:36 asgaard systemd[1]: Starting LSB: Router Advertising Daemon...
Jul 20 12:41:36 asgaard radvd[10017]: Starting radvd:
Jul 20 12:41:36 asgaard radvd[10017]: * IPv6 forwarding seems to be disabled.
Jul 20 12:41:36 asgaard radvd[10017]: * See /usr/share/doc/radvd/README.Debian
Jul 20 12:41:36 asgaard radvd[10017]: * radvd will *not* be started.
Jul 20 12:41:36 asgaard systemd[1]: Started LSB: Router Advertising Daemon.
So the warning about the configuration file went away, now we have to fix the IPv6 forwarding seems to be disabled. error.
For now you can enable it at the command line.
sudo sysctl -w net.ipv6.conf.all.forwarding=1
And restart and check radvd again.
sudo service radvd restart
systemctl status radvd
● radvd.service - LSB: Router Advertising Daemon
   Loaded: loaded (/etc/init.d/radvd; bad; vendor preset: enabled)
   Active: active (running) since Fri 2018-07-20 12:45:02 PDT; 20s ago
     Docs: man:systemd-sysv-generator(8)
  Process: 12255 ExecStop=/etc/init.d/radvd stop (code=exited, status=0/SUCCESS)
  Process: 12264 ExecStart=/etc/init.d/radvd start (code=exited, status=0/SUCCESS)
   CGroup: /system.slice/radvd.service
           ├─12275 /usr/sbin/radvd -u radvd -p /var/run/radvd/radvd.pid
           └─12276 /usr/sbin/radvd -u radvd -p /var/run/radvd/radvd.pid

Jul 20 12:45:01 asgaard systemd[1]: Starting LSB: Router Advertising Daemon...
Jul 20 12:45:02 asgaard radvd[12274]: version 2.11 started
Jul 20 12:45:02 asgaard radvd[12264]: Starting radvd: radvd.
Jul 20 12:45:02 asgaard systemd[1]: Started LSB: Router Advertising Daemon.
So it looks like our daemon is working. If you restart the server, though, the IPv6 port forwarding won't be enabled so open up /etc/sysctl.conf and un-comment out the following line.
net.ipv6.conf.all.forwarding=1
Now the next time you power on the computer it should be enabled.
To check if it's working you can put another device on the LAN and check ifconfig. In our radvd.conf file we defined the prefix for the address:
prefix 2001:db7::/64
So in the ifconfig output we should see an entry for an IPv6 address that starts with 2001:db7::. In fact I ended up with two.
inet6 2001:db7::b8b4:6adf:6267:5571  prefixlen 64  scopeid 0x0<global>
inet6 2001:db7::a80c:1a05:eaac:c1e8  prefixlen 64  scopeid 0x0<global>
I'm connecting to a remote network using OpenVPN served by an ASUS access point. I originally did it at the command line.
sudo openvpn --config client.ovpn
It turns out that this doesn't allow me to access anything outside of the network that I was connecting to. From what I can tell it's a DNS problem, but nothing I found about fixing DNS problems with OpenVPN from the command line worked. Luckily the Network Settings GUI works, but even then, it didn't work out of the box.
First, not everything you need is installed. Besides the openvpn client itself (which I had installed before trying to run it at the command line) you need some things for the network settings as well.
apt install openvpn network-manager-openvpn network-manager-openvpn-gnome
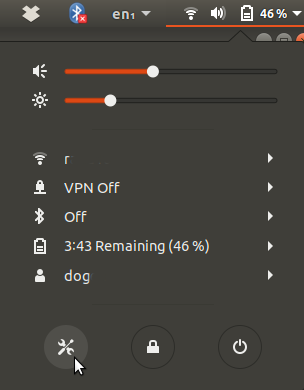
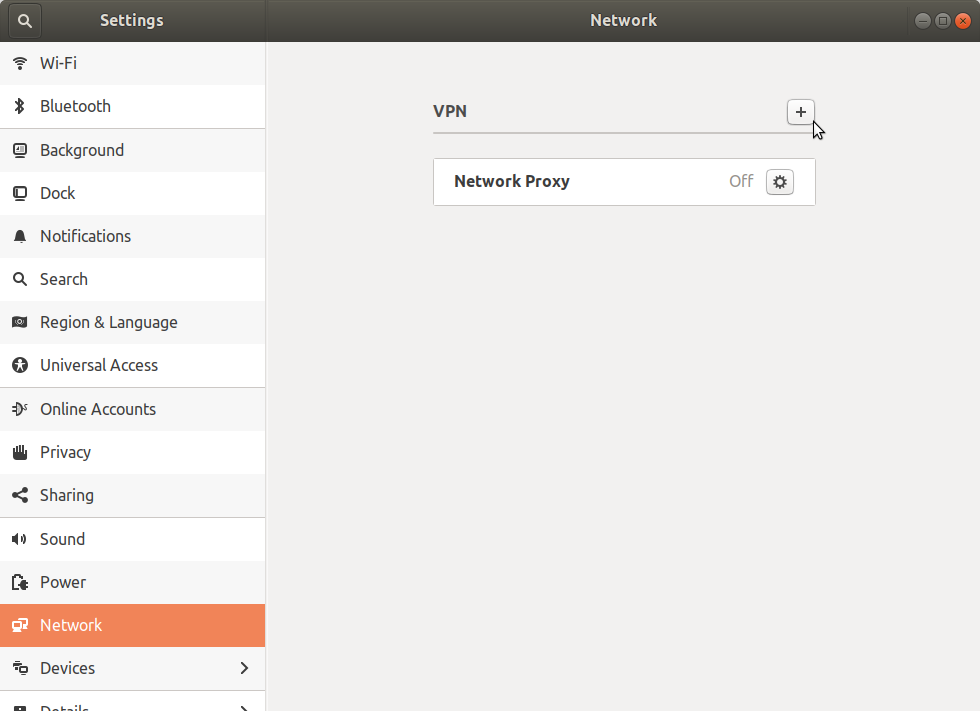
Now open the network settings.
In the window that pops up click on the + sign to add a connection.
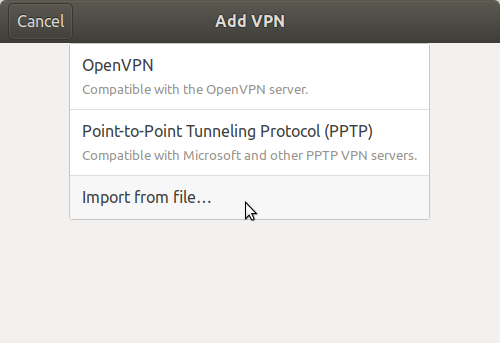
In the window that then pops up click on Import from file... (I'm assuming you are using a config file).
Navigate to the config file, and double-click on it. In the dialog that pops up enter whatever extra information you need. In my case it was the username and password.
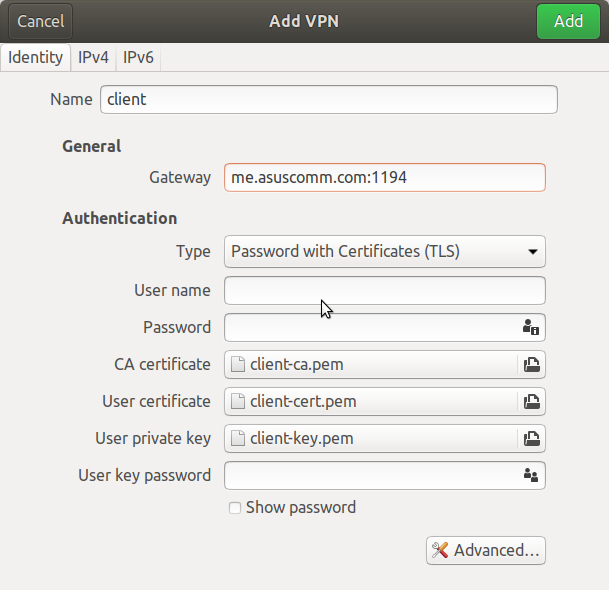
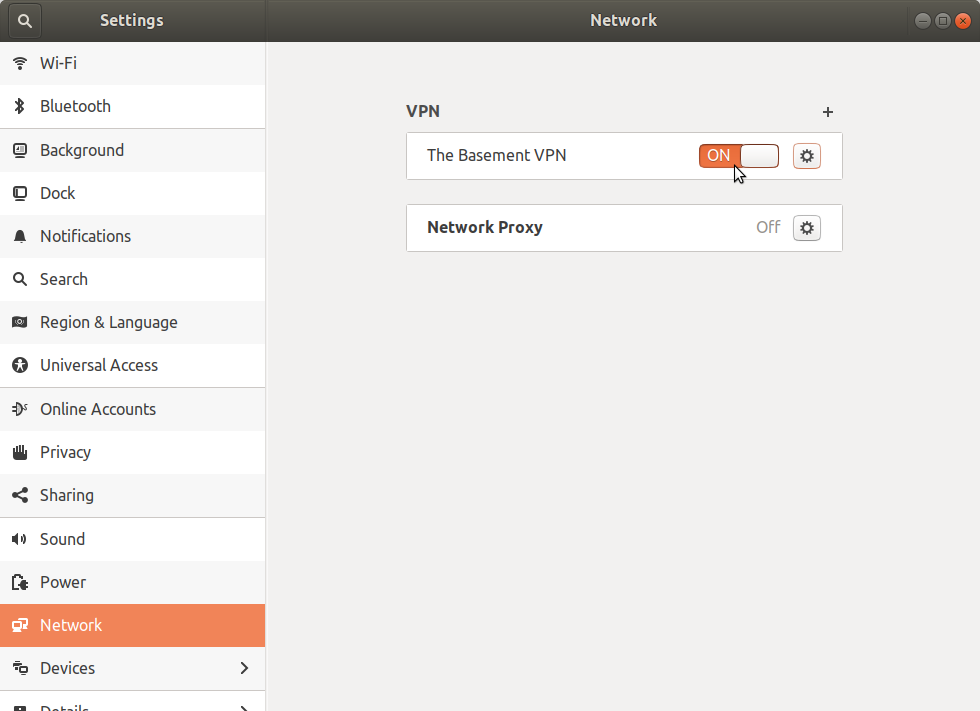
Click on the green 'Add' button and you should now have an entry for your VPN connection in the network settings. Click on the on switch (initially labeled 'Off') and if you're lucky it will connect.
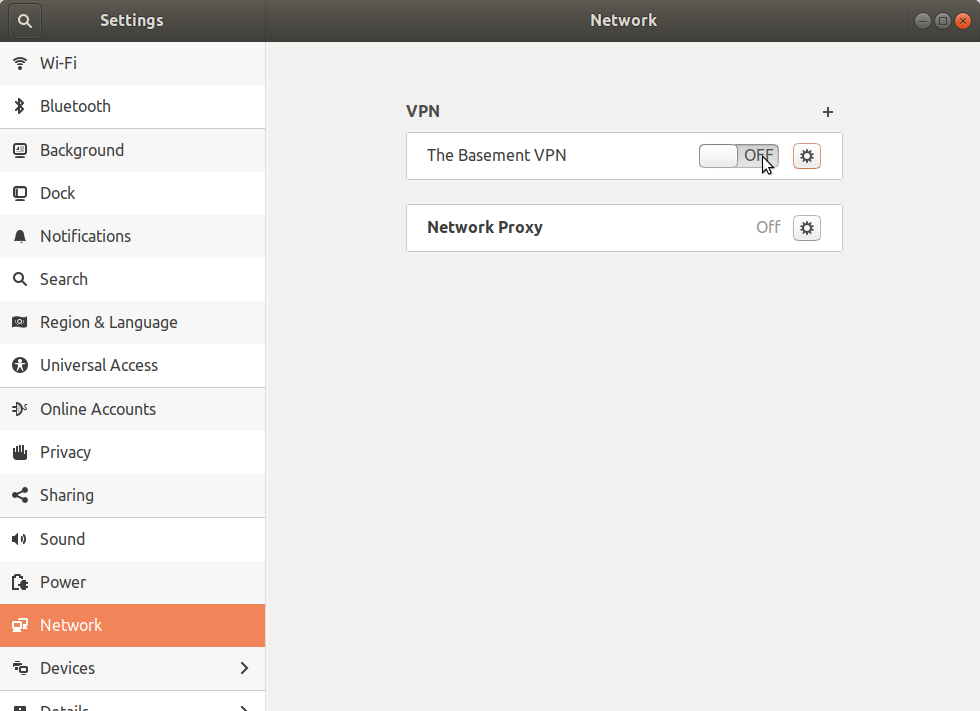
After you click on the switch it will look like this, but read on just in case it didn't.
Unfortunately for me it didn't connect. In /var/log/syslog I could see entries like this:
gnome-shell[2805]: Invalid VPN service type (cannot find authentication binary)
I don't know if the message is directly telling you this (it doesn't seem to), but it turns out that for some reason the Network Settings doesn't save your password. Look in /etc/NetworkManager/system-connections/ for a file that matches the name you gave your vpn in the settings. In my case it was just called 'client'. Open it as root in an editor.
sudo emacs /etc/NetworkManager/system-connections/client
Then change this line in the [vpn] section:
password-flags=1
to
password-flags=0
Then add this section.
[vpn-secrets]
password="your-password"
Where "your-password" is your vpn password. The quotation marks around your password are required.
First restart the network manager.
sudo service network-manager restart
Now re-open the network settings and click on the switch again. With any luck this time it will stay on and you can check by going to one of the devices on your VPN network.

I'm using tcpdump to store packets and thought that it might be a good idea to put it on an external drive. It turned out to be a little more complicated than I thought it would be so here are my notes.
The first thing I wanted to do was format the drive. First I needed to get the name.
sudo lshw -C disk
Gave me this
*-disk
      description: SCSI Disk
      product: Elements 25A1
      vendor: WD
      physical id: 0.0.0
      bus info: scsi@1:0.0.0
      logical name: /dev/sda
      version: 1014
      serial: WX71D186F83C
      size: 3725GiB (4TB)
      capabilities: gpt-1.00 partitioned partitioned:gpt
      configuration: ansiversion=6 guid=7ff8067e-6905-4746-a8ec-f3a1f90f99d0 logicalsectorsize=512 sectorsize=4096
So it's named /dev/sda. Now let's see if it's mounted.
lsblk -f
NAME        FSTYPE LABEL    UUID                                 MOUNTPOINT
sda
└─sda1      ntfs   Elements A4F2DF7DF2DF5262
mmcblk0
├─mmcblk0p1 vfat   PI_BOOT  EAD0-90DA                            /boot
└─mmcblk0p2 ext4   PI_ROOT  9d97a4df-a4eb-4b09-92b6-bb1ccfade0ee /
So you can see that there is a partition named sda1 and it's formatted using ntfs and it isn't mounted. Since I'm running it with linux I'll reformant the drive using ext4. I'm also going to give it the label westerndigital.
sudo mkfs -t ext4 -L westerndigital /dev/sda1
mke2fs 1.42.13 (17-May-2015)
/dev/sda1 contains a ntfs file system labelled 'Elements'
Proceed anyway? (y,n) y
Apparently Western Digital named the partition Elements. I entered y and continued.
Creating filesystem with 976745728 4k blocks and 244187136 inodes
Filesystem UUID: 00fb2543-edc3-4f84-874b-fc36c485f362
Superblock backups stored on blocks:
        32768, 98304, 163840, 229376, 294912, 819200, 884736, 1605632, 2654208,
        4096000, 7962624, 11239424, 20480000, 23887872, 71663616, 78675968,
        102400000, 214990848, 512000000, 550731776, 644972544
So checking it again.
lsblk -f
NAME        FSTYPE LABEL          UUID                                 MOUNTPOINT
sda
└─sda1      ext4   westerndigital cd10dc9f-7420-4b85-87ff-b8dfbf57f031
mmcblk0
├─mmcblk0p1 vfat   PI_BOOT        EAD0-90DA                            /boot
└─mmcblk0p2 ext4   PI_ROOT        9d97a4df-a4eb-4b09-92b6-bb1ccfade0ee /
Shows that it's now ext4 and it has the label westerndigital. According to this page the Hardware Abstraction Layer (HAL) will auto-mount drives that have labels, although I haven't tested this yet.
First make a directory for it.
sudo mkdir /media/westerndigital
Then mount it.
sudo mount /dev/sda1 /media/westerndigital/
Now we can check on it.
lsblk
NAME        MAJ:MIN RM  SIZE RO TYPE MOUNTPOINT
sda           8:0    0  3.7T  0 disk
└─sda1        8:1    0  3.7T  0 part /media/westerndigital
mmcblk0     179:0    0 29.8G  0 disk
├─mmcblk0p1 179:1    0   63M  0 part /boot
└─mmcblk0p2 179:2    0 29.8G  0 part /
So we can see that it's mounted at /media/westerndigital/.
First I needed to put the wireless interface into monitor mode.
iwconfig wlx00c0ca967afb mode monitor
Then I ran tcpdump.
sudo tcpdump -n -w /media/westerndigital//channel_6.pcap -C 1000 -W 10 --snapshot-length 0 --interface wlx00c0ca967afb -z gzip --relinquish-privileges erysichthon
Which gave me this.
tcpdump: /media/westerndigital//channel_6.pcap0: Permission denied
On my desktop the solution was in the comments of this StackOverflow post.
sudo apparmor_parser -R /etc/apparmor.d/usr.sbin.tcpdump
But on my raspberry pi this raised an error.
Cache read/write disabled: interface file missing. (Kernel needs AppArmor 2.4 compatibility patch.)
Warning: unable to find a suitable fs in /proc/mounts, is it mounted?
Use --subdomainfs to override.
The solution was in the same post. I just made the permissions wide open.
sudo chmod 777 /media/westerndigital
This is probably a security risk, but it works.
Success comes from knowing what you're best at and being aligned with your context. Even insanity can be helpful given the right context.
I recently started revisiting some vue.js code that I was working on at work and when I ran the unit-tests all of them failed with pretty much the same error.
actual.should.equal is not a function. (In 'actual.should.equal(expected)', 'actual.should.equal' is an instance of ProxyObject)
I'm using the chai BDD 'should' style of testing, so this should have worked (because it was working before). To debug it I ran it with FireFox and when I did, all the tests mysteriously started working. It turns out I was using PhantomJS, which has been abandoned, and somewhere along the line something in chai stopped working with it, so I decided to set up Firefox headless as my browser instead. This is how I did it.
I already had this installed for debugging, but I'll mention it anyway, for completeness.
npm install karma-firefox-launcher --save-dev
I'm running the tests using karma and I had hoped that I would just have to change the name of the browser in the configuration, but it turns out to need a little setup in the karma.conf.js file. First get rid of the PhantomJS reference. Delete this:
browsers: ['PhantomJS'],
and replace it with this.
browsers: ['FirefoxHeadless'],
The FirefoxHeadless browser isn't actually defined, so you have to add it (I put it right after the browsers declaration).
customLaunchers: {
      'FirefoxHeadless': {
        base: 'Firefox',
        flags: [
          '-headless',
        ],
      }
    },
This tells karma to run firefox and pass in the -headless flag, as shown in the Mozilla documentation about firefox's headless mode. I found out how to do it from a question on Stack Overflow.
PhantomJS breaks the Chai's BDD style of testing, but since both Firefox and Chrome have headless modes, using them instead makes it work without actually needing to have the GUI launch.