Pulling Images For the Abecedarium

Imports and Setup

Imports

# python
from pathlib import Path

import os

# pypi
from dotenv import load_dotenv
from google_images_download.google_images_download import googleimagesdownload as GoogleImages

Set Up

ENV_PATH = Path("~/projects/ape-iron/.env").expanduser()
assert ENV_PATH.is_file()

load_dotenv(ENV_PATH, override=True)

OUTPUT = Path(os.environ["ABECEDARIUM"]).expanduser()
google_images = GoogleImages()

Ape

A First (Failed Attempt)

APE_PATH = OUTPUT/"Ape/"
keywords = dict(
    keywords="gorilla",
    limit=20,
    type="photo",
    output_directory=str(APE_PATH),
    chromedriver="/usr/bin/chromedriver",
)
paths = google_images.download(keywords)

Item no.: 1 --> Item name = pig
Evaluating...
Starting Download...


Unfortunately all 20 could not be downloaded because some images were not downloadable. 0 is all we got for this search filter!

Errors: 0

Oops. It looks like the google-images-download project has been abandoned and no longer works. There are multiple bug reports for it. One mentions a fork that looks like it has more activity, but this bug report mentions another project called icrawlerwhich seems like a more general web-crawler that also says it has a google images downloader so maybe I'll try that instead.

Once Again With icrawler

from icrawler.builtin import GoogleImageCrawler
storage = dict(root_dir=APE_PATH)
crawler = GoogleImageCrawler(storage=storage)

Besides the keyword (keywords?) you can pass some other arguments. One notable option is a `filters` dictionary that helps specify the type of image.

Key Options
type “photo”, “face”, “clipart”, “linedrawing”, “animated”
color “color”, “blackandwhite”, “transparent”, “red”, “orange”, “yellow”, “green”
  “teal”, “blue”, “purple”, “pink”, “white”, “gray”, “black”, “brown”
size “large”, “medium”, “icon”
  larger than a given size (e.g. “>640x480”)
  exactly is a given size (“=1024x768”)
license “noncommercial”(labeled for noncommercial reuse)
  “commercial”(labeled for reuse)
  “noncommercial,modify”(labeled for noncommercial reuse with modification)
  “commercial,modify”(labeled for reuse with modification)
date “pastday”, “pastweek”
  tuple of dates, e.g. ((2016, 1, 1), (2017, 1, 1)) or ((2016, 1, 1), None)

The icrawler documentation suggests using the date-ranges to get past the 1,000 (or however many) image limit.

The arguments to the `crawl` method are:

Argument Default Description
keyword   The search term for the images
filters None A dictionary of image filter options (see above)
offset 0 Where to start in the search (e.g. skip first 10)
max_num 1000 Maximum number of images to pull (the service will set some limit, usually 1,000)
min_size None Minimum pixel size as a tuple (x-pixels, y-pixels)
max_size None Maximum image size as a tuple (x-pixels, y-pixels)
language None If you're not using English, I assume
file_idx_offset 0 icrawler names the downloaded files as numbers, this will be the next number to use

The code says that you can't set max_num to anything greater than 1,000. I think the offset is the amount to skip within that 1,000. Maybe. The icrawler ignores the names of the files given in the URLs and names them with numbers (e.g. 000001.jpg). If you make another crawl and don't want to clobber an earlier set of files you probably need to change the file_idx_offset (I think. I haven't tried it yet).

Let's see what happens if we pull gorilla photos.

crawler.crawl(keyword="gorilla",
              filters=dict(
                  type="photo"
              ))
2023-05-29 16:20:21,749 - INFO - icrawler.crawler - start crawling...
2023-05-29 16:20:21,752 - INFO - icrawler.crawler - starting 1 feeder threads...
2023-05-29 16:20:21,756 - INFO - icrawler.crawler - starting 1 parser threads...
2023-05-29 16:20:21,759 - INFO - icrawler.crawler - starting 1 downloader threads...
2023-05-29 16:20:22,776 - INFO - parser - parsing result page https://www.google.com/search?q=gorilla&ijn=0&start=0&tbs=itp%3Aphoto&tbm=isch
2023-05-29 16:20:23,223 - ERROR - downloader - Response status code 404, file https://upload.wikimedia.org/wikipedia/commons/thumb/b/bb/Gorille_des_plaines_de_l%27ouest_%C3%A0_l%27Espace_Zoologique.jpg
2023-05-29 16:20:23,871 - INFO - downloader - image #1  https://files.worldwildlife.org/wwfcmsprod/images/Mountain_Gorilla_Silverback_WW22557/story_full_width/36fcoamev0_Mountain_Gorilla_Silverback_WW22557.jpg
2023-05-29 16:20:24,774 - INFO - downloader - image #2  https://i.natgeofe.com/n/2d706180-e778-4110-9c15-1a7435b72114/mountain-gorillas-rwanda-02_3x4.jpg
2023-05-29 16:20:25,115 - INFO - downloader - image #3  https://www.nczoo.org/sites/default/files/2020-05/Gorilla-5.jpg
2023-05-29 16:20:25,465 - INFO - downloader - image #4  https://cdn.britannica.com/79/20279-050-ECDF21A7/mountain-gorilla-Virunga-National-Park-Democratic-Republic.jpg
2023-05-29 16:20:25,651 - ERROR - downloader - Response status code 401, file https://optimise2.assets-servd.host/maniacal-finch/production/animals/WL_Gorilla.jpg
2023-05-29 16:20:25,859 - INFO - downloader - image #5  https://media.npr.org/assets/img/2021/10/08/ap21280523738198-1--cc4c958352f2bd1a4a45c203f1f7807fc0193457-s1100-c50.jpg
2023-05-29 16:20:26,463 - INFO - downloader - image #6  https://media-cldnry.s-nbcnews.com/image/upload/rockcms/2022-01/220125-atlanta-zoo-ozzie-male-gorilla-obit-ac-849p-0cdfbe.jpg
2023-05-29 16:20:26,510 - INFO - downloader - image #7  https://files.worldwildlife.org/wwfcmsprod/images/HERO_Mountain_Gorilla_Silverback_WW22557/hero_small/17l7fosr27_Mountain_Gorilla_Silverback_WW22557.jpg
2023-05-29 16:20:27,116 - INFO - downloader - image #8  https://images.immediate.co.uk/production/volatile/sites/23/2014/07/GettyImages-157862378-7432ede.jpg
2023-05-29 16:20:27,314 - INFO - downloader - image #9  https://t4.ftcdn.net/jpg/05/65/55/03/360_F_565550348_QbLFP5eFniY4cGy230zuhGcz0pcG56YC.jpg
2023-05-29 16:20:30,876 - INFO - downloader - image #10 https://www.wwf.org.uk/sites/default/files/styles/hero_m/public/2019-08/mountain_gorilla_Rwanda.jpg
2023-05-29 16:20:31,178 - INFO - downloader - image #11 https://detroitzoo.org/wp-content/uploads/2015/08/Gorilla-Pende.jpg
2023-05-29 16:20:31,792 - INFO - downloader - image #12 https://cbsaustin.com/resources/media/eab965d5-d9d1-4739-90ad-7b029219bd7c-large16x9_ScreenShot20230407at12.47.20PM.png
2023-05-29 16:20:32,583 - INFO - downloader - image #13 https://newschannel20.com/resources/media/eab965d5-d9d1-4739-90ad-7b029219bd7c-large3x4_ScreenShot20230407at12.47.20PM.png
2023-05-29 16:20:33,167 - ERROR - downloader - Response status code 400, file https://th-thumbnailer.cdn-si-edu.com/J_03GIL6RkkkoUYxjX1bZ2uhArg\u003d/1072x720/filters:no_upscale()/https://tf-cmsv2-smithsonianmag-media.s3.amazonaws.com/filer/45/e8/45e81e74-8044-4a89-a679-6d0eaa70d6fc/caters_gorilla_punch_03.jpg
2023-05-29 16:20:33,883 - INFO - downloader - image #14 https://upload.wikimedia.org/wikipedia/commons/5/50/Male_gorilla_in_SF_zoo.jpg
2023-05-29 16:20:34,899 - INFO - downloader - image #15 https://i.natgeofe.com/n/e180e488-e4e1-472d-9d4f-b2138978903c/01-gorilla-stare_4x3.jpg
2023-05-29 16:20:35,491 - INFO - downloader - image #16 https://cdn.britannica.com/79/126579-050-17FD9CF2/lowland-gorilla.jpg
2023-05-29 16:20:36,169 - INFO - downloader - image #17 https://foxchattanooga.com/resources/media/44a66631-49af-4355-ad52-845f43e9411d-pittsburghzoobabygorilla2.png
2023-05-29 16:20:36,550 - INFO - downloader - image #18 https://gorillafund.org/wp-content/uploads/2022/09/Ubwitange.jpg
2023-05-29 16:20:36,964 - INFO - downloader - image #19 https://www.rainforest-alliance.org/wp-content/uploads/2021/06/baby-mountain-gorilla-1.jpg
2023-05-29 16:20:40,643 - INFO - downloader - image #20 https://ichef.bbci.co.uk/news/976/cpsprodpb/2533/production/_119132590_2.60637068.jpg
2023-05-29 16:20:40,986 - INFO - downloader - image #21 https://images.theconversation.com/files/246210/original/file-20181119-76137-1c4570v.jpg
2023-05-29 16:20:41,194 - INFO - downloader - image #22 https://m.media-amazon.com/images/I/81uzcxVyiaL._AC_UF894,1000_QL80_.jpg
2023-05-29 16:20:41,621 - INFO - downloader - image #23 https://zooatlanta.org/wp-content/uploads/gorilla_baby2023_230425_shalia_baby_ZA_2T0A6711.jpg
2023-05-29 16:20:41,878 - ERROR - downloader - Response status code 403, file https://gray-whsv-prod.cdn.arcpublishing.com/resizer/5SrqNB2HFQ5OH7-D5Da0plW2zH4\u003d/1200x675/smart/filters:quality(85)/cloudfront-us-east-1.images.arcpublishing.com/gray/TB36MKZ2ENACBLSWNP6INGD3HA.jpg
2023-05-29 16:20:42,635 - INFO - downloader - image #24 https://ichef.bbci.co.uk/news/976/cpsprodpb/C173/production/_119132594_2.60637064.jpg
2023-05-29 16:20:43,442 - INFO - downloader - image #25 https://www.cmzoo.org/wp-content/uploads/Roxy-1024x680.jpg
2023-05-29 16:20:43,747 - INFO - downloader - image #26 https://media.npr.org/assets/img/2022/01/26/western-lowland-gorilla-ozzie_zoo-atlanta-1b335bebb3e98145cd3216e20b668c617b370a58.jpg
2023-05-29 16:20:44,376 - INFO - downloader - image #27 https://www.columbuszoo.org/sites/default/files/styles/square_large/public/assets/animals/Gorilla%20%28Ktembe%29%2009956%20-%20Grahm%20S.%20Jones%2C%20Columbus%20Zoo%20and%20Aquarium.jpg
2023-05-29 16:20:47,970 - ERROR - downloader - Response status code 500, file https://npr.brightspotcdn.com/dims4/default/4ef2621/2147483647/strip/true/crop/1995x1047+0+117/resize/1200x630!/quality/90/?url\u003dhttp%3A%2F%2Fnpr-brightspot.s3.amazonaws.com%2F5e%2F11%2Fe4ca0a63450c8922417ecba1048e%2F20230308-pz2-8574-cpaulselvaggio-web.jpg
2023-05-29 16:20:48,432 - INFO - downloader - image #28 https://i.natgeofe.com/n/8fa82b8d-0110-48d4-9e01-2926d359c784/mountain-gorillas-rwanda-05_square.jpg
2023-05-29 16:20:48,823 - INFO - downloader - image #29 https://assets3.thrillist.com/v1/image/2782161/1020x765/scale;webp\u003dauto;jpeg_quality\u003d60.jpg
2023-05-29 16:20:49,148 - INFO - downloader - image #30 https://www.awf.org/sites/default/files/Website_SpeciesPage_MountainGorilla01_Hero.jpg
2023-05-29 16:20:49,639 - INFO - downloader - image #31 https://www.jsonline.com/gcdn/presto/2022/07/28/PMJS/9508fe0d-e41f-4c90-922a-f738e6254964-GorillaStare2_4k.jpg
2023-05-29 16:20:50,000 - ERROR - downloader - Response status code 403, file https://www.bostonglobe.com/resizer/UdvN4BJ3rNxChcQaeBBvfctPC6k\u003d/arc-anglerfish-arc2-prod-bostonglobe/public/XLLV4FEUWWSBUJGFQCPXXOEOSY.jpg
2023-05-29 16:20:50,418 - INFO - downloader - image #32 https://louisvillezoo.org/wp-content/uploads/2019/06/Kindi.jpg
2023-05-29 16:20:50,991 - INFO - downloader - image #33 https://sdzsafaripark.org/sites/default/files/styles/hero_with_nav_gradient/public/hero/hero-gorilla.jpg
2023-05-29 16:20:51,377 - INFO - downloader - image #34 https://media.11alive.com/assets/WXIA/images/dba319a2-1f5b-475c-abc2-2070f5695624/dba319a2-1f5b-475c-abc2-2070f5695624_1920x1080.jpg
2023-05-29 16:20:51,790 - INFO - downloader - image #35 https://cbsaustin.com/resources/media/8c872d35-142a-497b-8e40-c7318cf731ce-medium16x9_ScreenShot20230407at1.29.59PM.png
2023-05-29 16:20:54,454 - INFO - downloader - image #36 https://1.bp.blogspot.com/-BSQMRiOCqII/YElP3Sr0qUI/AAAAAAAATEo/E2SvBKQFnmEIjywIvw7oZQ4g5jgLChvkwCLcBGAsYHQ/s2048/Zuna%2B4x6%2Bhigh%2Bres.jpg
2023-05-29 16:20:54,771 - INFO - downloader - image #37 https://d21yqjvcoayho7.cloudfront.net/wp-content/uploads/2022/08/31/Mashika1.jpg
2023-05-29 16:20:55,344 - INFO - downloader - image #38 https://media.cnn.com/api/v1/images/stellar/prod/190422153943-gorillas-selfie-virunga-national-park.jpg
2023-05-29 16:20:55,950 - INFO - downloader - image #39 https://whc.vetmed.ucdavis.edu/sites/g/files/dgvnsk5261/files/styles/sf_landscape_16x9/public/images/article/1-infant%20mtn%20gorilla-Katwe%20Group-OCT%2019%20Bwindi-copyright%20Gorilla%20Doctors-compressed.jpg
2023-05-29 16:20:56,185 - INFO - downloader - image #40 https://media.npr.org/assets/img/2018/01/11/pasikanpr-188adc923bb86ae3a69237493c0aa76f70e75a4a-s1100-c50.jpg
2023-05-29 16:20:56,665 - INFO - downloader - image #41 https://images.newscientist.com/wp-content/uploads/2016/07/13163431/lead_whittier20150521001-5.jpg
2023-05-29 16:20:57,702 - INFO - downloader - image #42 https://good-nature-blog-uploads.s3.amazonaws.com/uploads/2018/01/silverback-gorilla-africa-Benjamin_Thomas.jpg
2023-05-29 16:20:58,455 - INFO - downloader - image #43 https://comozooconservatory.org/wp-content/uploads/2023/04/Gorilla-credit-Steve-Solmonson.jpg
2023-05-29 16:20:59,291 - INFO - downloader - image #44 https://nationalzoo.si.edu/sites/default/files/styles/768_scale/public/newsroom/20230527-valschultz-012-gorilla-infant.jpg
2023-05-29 16:20:59,632 - ERROR - downloader - Response status code 400, file https://cdn.theatlantic.com/thumbor/zN3P8Eg5R2KCRWXgbG3B9VUqxB0\u003d/243x0:3243x2250/1200x900/media/img/mt/2016/11/RTR3NO4M/original.jpg
2023-05-29 16:20:59,940 - INFO - downloader - image #45 https://gorillafund.org/wp-content/uploads/2022/05/Silverback-gorilla-Mafunzo-1024x768.jpg
2023-05-29 16:21:00,189 - ERROR - downloader - Response status code 400, file https://people.com/thmb/zJuWJJxNflt35JwcK9ifuDmcHV4\u003d/1500x0/filters:no_upscale():max_bytes(150000):strip_icc():focal(749x0:751x2)/prince-charles-baby-mountain-gorilla-ubwuzuzanye-090222-231cd500ae6a48aab86d28b031c64d1a.jpg
2023-05-29 16:21:00,523 - ERROR - downloader - Response status code 500, file https://ca-times.brightspotcdn.com/dims4/default/dd8d9f5/2147483647/strip/true/crop/5500x2888+0+518/resize/1200x630!/quality/80/?url\u003dhttps%3A%2F%2Fcalifornia-times-brightspot.s3.amazonaws.com%2F6c%2Fb9%2Fc874005242be8d9bab87c9b81f4a%2Fla-zoo-gorilla-94162.jpg
2023-05-29 16:21:00,884 - ERROR - downloader - Response status code 500, file https://ewscripps.brightspotcdn.com/dims4/default/4fe6984/2147483647/strip/true/crop/1230x646+0+84/resize/1200x630!/quality/90/?url\u003dhttp%3A%2F%2Fewscripps-brightspot.s3.amazonaws.com%2Fe2%2F03%2F781609d74315a69123afb278c6b4%2Fscreen-shot-2022-10-10-at-2.08.29%20PM.png
2023-05-29 16:21:01,469 - INFO - downloader - image #46 https://cloudfront-us-east-1.images.arcpublishing.com/advancelocal/ELEEDHM3YVEYZGD5KZNQZS2ZSY.jpg
2023-05-29 16:21:01,892 - INFO - downloader - image #47 https://www.first5la.org/wp-content/uploads/2020/08/baby-gorilla-tuena-3950983001_534.jpg
2023-05-29 16:21:05,250 - INFO - downloader - image #48 https://images.csmonitor.com/csm/2013/03/gorilla.jpg
2023-05-29 16:21:06,130 - INFO - downloader - image #49 https://cdn.hswstatic.com/gif/gorillas.jpg
2023-05-29 16:21:06,905 - INFO - downloader - image #50 https://files.worldwildlife.org/wwfcmsprod/images/mountain_gorilla_tom_deuitch/story_full_width/3tsywpr4hc___Tom_Deuitch.jpg
2023-05-29 16:21:07,576 - INFO - downloader - image #51 https://www.northeastohioparent.com/wp-content/uploads/2022/10/Kayembe-on-Freddy.jpg
2023-05-29 16:21:08,096 - INFO - downloader - image #52 https://media.apenheul.nl/aphl-cache/0/a/a/9/f/5/0aa9f5cdc1936be4e7937b33e6d625c2b46d4eff.jpg
2023-05-29 16:21:08,182 - ERROR - downloader - Response status code 400, file https://people.com/thmb/9KajO2h4En_kPrf_ZstX4qa0tyQ\u003d/1500x0/filters:no_upscale():max_bytes(150000):strip_icc():focal(688x459:690x461)/kiki-the-gorilla-2000-d0450f98d6894f47892c9e8e088aec61.jpg
2023-05-29 16:21:08,512 - INFO - downloader - image #53 https://9b16f79ca967fd0708d1-2713572fef44aa49ec323e813b06d2d9.ssl.cf2.rackcdn.com/1140x_a10-7_cTC/pittsburgh-zoo-gorilla-1681372480.jpg
2023-05-29 16:21:09,233 - INFO - downloader - image #54 https://cdnph.upi.com/ph/st/th/7381444250950/2015/upi/e113f94e3f13ce7e262fd708f10b66e8/v1.5/8-things-you-didnt-know-about-baby-gorillas.jpg
2023-05-29 16:21:09,824 - INFO - downloader - image #55 https://assets-fortworthbusiness-com.s3-accelerate.amazonaws.com/2022/11/baby-gorillajpg-2-scaled.jpg
2023-05-29 16:21:10,084 - ERROR - downloader - Response status code 500, file https://npr.brightspotcdn.com/dims4/default/efcc501/2147483647/strip/true/crop/1200x739+0+124/resize/880x542!/quality/90/?url\u003dhttp%3A%2F%2Fnpr-brightspot.s3.amazonaws.com%2Flegacy%2Fsites%2Fkera%2Ffiles%2F201807%2Fbaby.jpg
2023-05-29 16:21:11,683 - INFO - downloader - image #56 https://images.thdstatic.com/productImages/31840f43-31cb-42c1-94d2-104e9c4ac138/svn/design-toscano-garden-statues-ne110088-44_600.jpg
2023-05-29 16:21:12,344 - INFO - downloader - image #57 https://d.newsweek.com/en/full/2012821/mambie-gorilla.jpg
2023-05-29 16:21:12,793 - INFO - downloader - image #58 https://npr.brightspotcdn.com/legacy/sites/wjct/files/201902/gandai_by_lynde_nunn__1_.jpg
2023-05-29 16:21:14,785 - INFO - downloader - image #59 https://cloudfront-us-east-1.images.arcpublishing.com/bostonglobe/GZCMY47RIA323XUKPTLSPEPAPY.jpg
2023-05-29 16:21:15,175 - INFO - downloader - image #60 https://cbsaustin.com/resources/media/d86faa81-97a5-4cb5-9dbf-6c50944fdf15-medium16x9_ScreenShot20230407at1.58.11PM.png
2023-05-29 16:21:20,475 - ERROR - downloader - Exception caught when downloading file https://dl0.creation.com/articles/p150/c15079/Gorilla.jpg, error: HTTPSConnectionPool(host='dl0.creation.com', port=443): Read timed out. (read timeout=5), remaining retry times: 2
2023-05-29 16:21:20,660 - INFO - downloader - image #61 https://dl0.creation.com/articles/p150/c15079/Gorilla.jpg
2023-05-29 16:21:21,628 - INFO - downloader - image #62 https://i0.wp.com/sitn.hms.harvard.edu/wp-content/uploads/2021/04/Picture1.jpg
2023-05-29 16:21:22,070 - INFO - parser - parsing result page https://www.google.com/search?q=gorilla&ijn=1&start=100&tbs=itp%3Aphoto&tbm=isch
2023-05-29 16:21:22,321 - INFO - downloader - image #63 https://www.pbs.org/wnet/nature/files/2021/07/amy-reed-XB5E4D-Ipco-unsplash-scaled-e1627330380270.jpg
2023-05-29 16:21:22,687 - INFO - downloader - image #64 https://images.theconversation.com/files/267521/original/file-20190404-131437-psnnwu.jpg
2023-05-29 16:21:22,841 - INFO - parser - parsing result page https://www.google.com/search?q=gorilla&ijn=2&start=200&tbs=itp%3Aphoto&tbm=isch
2023-05-29 16:21:23,133 - INFO - downloader - image #65 https://assets.rebelmouse.io/eyJhbGciOiJIUzI1NiIsInR5cCI6IkpXVCJ9.eyJpbWFnZSI6Imh0dHBzOi8vYXNzZXRzLnJibC5tcy8yNjM3OTM0Ny9vcmlnaW4uanBnIiwiZXhwaXJlc19hdCI6MTY5MjY4ODUxMH0.-R0AvhdriipRZSfYTpfq-CFuNPsCRhl6gd0Z9VNrA88/img.jpg
2023-05-29 16:21:23,522 - INFO - parser - parsing result page https://www.google.com/search?q=gorilla&ijn=3&start=300&tbs=itp%3Aphoto&tbm=isch
2023-05-29 16:21:23,593 - INFO - feeder - thread feeder-001 exit
2023-05-29 16:21:23,930 - INFO - downloader - image #66 https://i0.wp.com/eastafricanjunglesafaris.com/wp-content/uploads/2019/08/Header-1.jpg
2023-05-29 16:21:24,222 - INFO - parser - parsing result page https://www.google.com/search?q=gorilla&ijn=4&start=400&tbs=itp%3Aphoto&tbm=isch
2023-05-29 16:21:24,998 - INFO - parser - parsing result page https://www.google.com/search?q=gorilla&ijn=5&start=500&tbs=itp%3Aphoto&tbm=isch
2023-05-29 16:21:25,822 - INFO - parser - parsing result page https://www.google.com/search?q=gorilla&ijn=6&start=600&tbs=itp%3Aphoto&tbm=isch
2023-05-29 16:21:26,593 - INFO - parser - parsing result page https://www.google.com/search?q=gorilla&ijn=7&start=700&tbs=itp%3Aphoto&tbm=isch
2023-05-29 16:21:27,387 - INFO - parser - parsing result page https://www.google.com/search?q=gorilla&ijn=8&start=800&tbs=itp%3Aphoto&tbm=isch
2023-05-29 16:21:28,307 - INFO - parser - parsing result page https://www.google.com/search?q=gorilla&ijn=9&start=900&tbs=itp%3Aphoto&tbm=isch
2023-05-29 16:21:28,932 - INFO - downloader - downloader-001 is waiting for new download tasks
2023-05-29 16:21:30,411 - INFO - parser - no more page urls for thread parser-001 to parse
2023-05-29 16:21:30,412 - INFO - parser - thread parser-001 exit
2023-05-29 16:21:33,934 - INFO - downloader - no more download task for thread downloader-001
2023-05-29 16:21:33,935 - INFO - downloader - thread downloader-001 exit
2023-05-29 16:21:34,776 - INFO - icrawler.crawler - Crawling task done!
print(f"Downloaded: {sum(1 for path in APE_PATH.iterdir())}")
Downloaded: 66

So, even though the default maximum number of images is 1,000, it actually only pulled down 66. There are some error codes in the logger's output, but that seems like a big discrepancy. Oh, well, okay for a first try.

Bison

Looking at the output of the Ape crawl, it looks like it only used one thread per object (i.e. one feeder, one parser, and one downloader. Maybe I'll try and push that up and see what happens.

BISON_PATH = OUTPUT/"Bison"
storage["root_dir"] = BISON_PATH

crawler = GoogleImageCrawler(storage=storage,
                             feeder_threads=2,
                             parser_threads=2,
                             downloader_threads=4)

filters = dict(type="photo")

crawler.crawl(keyword="bison",
              filters=filters,
              )
print(f"Downloaded: {sum(1 for path in BISON_PATH.iterdir())}")
Downloaded: 97

I ran this twice. The first time I got 70 files, then for this run I disconnected the VPN, which seemed to increase the file count a little, but not a lot.

Chimpanzee

get_images("chimpanzee")

Cow

def get_images(keyword):
    PATH = OUTPUT/keyword.capitalize()
    crawler = GoogleImageCrawler(storage=dict(root_dir=PATH))
    crawler.crawl(keyword=keyword,
                  filters=dict(type="photo"))
    return
get_images("cow")

Despite putting type=photo in there, the cow output had some drawings in the images, I guess it isn't perfect.

get_images("cow horned")

Dragon

get_images("dragon temple statue")

Elephant

get_images("elephant")

Frog

get_images("frog")

Goat (Horned)

get_images("goat horned")

Hippo

get_images("hippopotamus")

Iguana

get_images("iguana")

Jackrabbit

get_images("jackrabbit")
get_images("antelope american")

Krampus

get_images("krampus mask")

Lobster

get_images("lobster animal")

Minotaur

get_images("minotaur statue")

Namahage

get_images("namahage costume")

Octopus

get_images("octopus ocean")

Pig

get_images("pig european adult")

Quetzacoatl

get_images("quetzalcoatl statue")

Rhinoceros

get_images("rhinoceros")

Samurai

get_images("samurai armor")

Tortoise

get_images("tortoise")

Unicorn (horse)

get_images("horse")

Vampire Fish

get_images("vamprie fish -lamprey")

Wasp

get_images("wasp")

Chicken (Rooster)

get_images("rooster")
get_images("x-ray specs")

Yak

get_images("yak")
get_images("uncle sam hat")

Zebu

get_images("zebu")
Two-Dimensional Noise

Introduction

This is yet another copy and redo of a sketch from the Nature of Code. This time it's an extension of a prior post on making a one-dimensional noise graph.

Static Version (Using Set)

This first sketch is a static two-dimensional visualization of the p5 noise function, with the pixels of the canvas set to a level of gray (from black to white) based on the noise. I'll be doing the sketch again using a different method but this first one uses the (ambiguously named) set function that lets you set the grayscale or RGB-Alpha value for a single logical pixel (because different displays have different pixel-densities, there might be more "physical" pixels dedicated to each logical one, giving you better resolution). The set function is the simplest way to set a pixel, but, as noted in the p5 documentation, it adds overhead so there's another recommended way to do it if you need it to go faster (which is what the next section - Static Version Setting Pixels - is about). For static images (as this is) it's fast enough, though.

The Closure Function

This is the basic function that we pass to the p5 constructor to create our sketch.

function simple_sketch(p5) {
  const MAXIMUM_INTENSITY = 255;
  const NOISE_OFFSET_INCREMENT = 0.01;

We're only going to set the grayscale channel which has a maximum value of 255, thus the MAXIMUM_INTENSITY multiplied by noise will be what we use to figure out what value to set each pixel. The NOISE_OFFSET_INCREMENT is the amount that we're going to increase the x and y values as we step through the noise-space.

Set Up

First I'll define the p5 setup function. All it does is create the canvas that's the width of the div container. I'm using a variable STATIC_NOISE_GRAPH_DIV that I didn't show, but it just has the HTML div ID that will hold the sketch.

p5.setup = function() {
  p5.createCanvas(
    document.getElementById(STATIC_NOISE_GRAPH_DIV).offsetWidth,
    400);
} //end setup

Draw

The p5 draw function is where we do all the work of drawing the plot so I'll break it up a little bit to explain more of what's here.

p5.draw = function() {
  let intensity;
  let column_offset = 0.0;
  let row_offset;

Besides defining the function I'm declaring a variable, column_offset that holds the x-input value for the noise function, as well as row_offset which will hold the y-input.

I'm also creating a variable, intensity to hold the RGB setting we're going to use. It gets passed immediately to set once the value is created so it isn't really needed, I just created it for clarity.

Load Pixels

p5.loadPixels();

Behind the scenes the set function is actually manipulating a special data-structure called pixels, which I'll look at more in the next sketch. The important thing to note is that you have to load the display data into the array before you can use it (using loadPixels()), even when using the set function.

The For-Loops

for (let column = 0; column < p5.width; column++) {
  row_offset = 0.0;

  for (let row = 0; row < p5.height; row++) {

Since we're setting each of the pixels in the canvas I'll use two for-loops, traversing each column from top row to bottom row before moving on to the next column. I had previously followed the convention of using x for columns and y for rows, but I think calling them columns and rows will be a little clearer when we get to the next sketch.

Set the Intensity

let intensity = p5.noise(column_offset, row_offset) * MAXIMUM_INTENSITY;
p5.set(column, row, intensity);

The intensity for each pixel is the noise at the offset for that column-row pair multiplied by the MAXIMUM_INTENSITY (255) (since noise goes from \(0 \ldots 1\) and RGB-Alpha goes from \(0 \ldots 255\).) this gives us a fractional value of the MAXIMUM_INTENSITY. Once we get it we can set it at the matching column and row coordinate. The intensity is going to be a float, but as we'll see in the next sktech that won't matter, since the pixels array casts values to an integer, although I suppose if it were more important we might want to control it using floor, ceiling, or round. But since this is using noise I don't imagine we'd know the difference.

End the For-Loops

    row_offset += NOISE_OFFSET_INCREMENT;
  } //end row-for

  column_offset += NOISE_OFFSET_INCREMENT;
} // end column-for

At the end of each of the for-loops we add an offset value to change the input to the noise function by a little.

Update the Pixels and Stop the Loop

  p5.updatePixels();
  p5.noLoop();
} // end draw

When we called loadPixels we loaded the pixels array, then we updated the values in the array, but that alone won't update our canvas. To update our sketch we need to tell p5 to take our array values and apply them by calling updatePixels. Additionally, since we're looping over the same for-loop values over and over, the noise output isn't going to change so I'll call noLoop to stop the updating of the canvas.

Finally, I'll create the p5 instance with our sketch function, and we should be able to see the noise visualization.

new p5(simple_sketch, STATIC_NOISE_GRAPH_DIV);

And there you go. Now onto a version that sets the pixel array directly without using the set method.

Static Version Setting Pixels

This will essentially be the same sketch except instead of using the set function I'll set the values in the pixels array directly.

Some Constants

I'm not as familiar with javascript as I am with python so I was littering constant values all over the place trying to figure where the best place to put them would be. I finally decided to create these two objects to hold some constants that I'll use when updating the pixels array and when setting the slider up.

const PIXEL_ARRAY = {
  RED: 0,
  GREEN : 1,
  BLUE : 2,
  ALPHA : 3,
  CELLS_PER_PIXEL : 4,
  RGB_MAX : 255,
} // end PIXEL_ARRAY

The RED, GREEN, BLUE, and ALPHA values are to help locate their relative location in the array (more on that later), as is the CELLS_PER_PIXEL. I made RGB_MAX is so that maybe it's a little more obvious why there's a number 255 showing up in the code.

const SLIDER = {
  min: 0,
  max: 1,
  default_value: 0.01,
  step_size: 0,
} // end SLIDER_SETTINGS

These are the same values I used in the previous noise-sketches. A step_size of 0 just means that I'm not setting one so p5 can use whatever the default value is - the documentation says it's continuous but it seems to jump a bit when I use it.

Noise Plotter

The Noise Plotter class is going to draw the two-dimensional noise-visualization using the current slider value as the step-size to change the noise input.

The Noise Plotter Class

So, let's get started with the class definition.

class NoisePlotter {

There's nothing really being done in the constructor except storing the p5 and slider objects for later.

constructor(p5, slider) {
  this.slider = slider;
  this.p5 = p5
} // end constructur

The Draw Method

This is the workhorse that does all the plotting.

draw() {
  let intensity;
  let column_offset;
  let offset_increment = this.slider.value()
  let row_offset = 0;
  let pixel_index;

The variables:

  • intensity: This will hold the RGB value(s) that we set the pixels to based on noise
  • column_offset: The y-input for the noise function
  • offset_increment: How much to increase the noise function inputs (the offsets) in the loops
  • row_offset: x-input for the noise function
  • pixel_index: Starting index in the pixels array for our pixel

That last variable might take some explaining, so maybe here's a good spot to dump my understanding of how this works.

  this.p5.loadPixels();

  for (let y=0; y < this.p5.height; y++) {
    column_offset = 0;
    for (let x=0; x < this.p5.width; x++) {
      pixel_index = (x + y * this.p5.width) * PIXEL_ARRAY.CELLS_PER_PIXEL;
      intensity = (this.p5.noise(column_offset, row_offset)
                   * PIXEL_ARRAY.RGB_MAX);
      this.p5.pixels[pixel_index +
                     PIXEL_ARRAY.RED] = intensity;
      this.p5.pixels[pixel_index +
                     PIXEL_ARRAY.GREEN] = intensity;
      this.p5.pixels[pixel_index +
                     PIXEL_ARRAY.BLUE] = intensity;
      this.p5.pixels[pixel_index +
                     PIXEL_ARRAY.ALPHA] = PIXEL_ARRAY.RGB_MAX;
      column_offset += offset_increment;        
    } // end x for
    row_offset += offset_increment;
  }// end x for
  this.p5.updatePixels();
} // end draw

The Sketch

Note for later: You have to either set the background or the set the alpha channel in the pixel array. Leaving both out won't show anything.

The Closure Function

function static_pixels(p5) {
  const HEIGHT = 400;

  let plotter;
  let slider;

Once again, this is the sketch function that gets passed to a p5 constructor. I decided to create a class to handle the drawing of the visualization so the plotter variable is going to hold an instance of that. I'm also going to add a slider so that a user can change the amount the input to the noise changes, which is what the silder variable is for.

Set Up

p5.setup = function() {

Just the basic p5 setup function.

  • You Are My Density
    p5.pixelDensity(1);
    

    To draw the noise I'm going to set the values in the pixels array directly but that's actually not so straightforward as you might think. When we refer to a pixel, there's two things to consider - there's a logical pixel, which is what we referred to using the set function, and what most people probably think of when working with p5 - it's the (x, y) coordinate you've come to know and love, but that pixel doesn't necessarily map one-to-one with the physical pixels in a display. Because of this, the size of the pixels array and the number of cells within the array dedicated to each pixel depends on the display.

    The pixels documentation shows the proper way to set all the physical pixels, which requires you to check the pixelDensity and then for each logical pixel you would loop over the sub-pixels that represent it… maybe some other time. For now, setting pixelDensity(1) will turn off matching the pixel density of the user's display and let us just worry about the one logical pixel. I don't know if that means it wont' take advantage of a higher density display or not, but p5 is about making it easier to code visualizations, not high performance (to me, anyway) - and as we'll see, the for-loops we're using are already slow enough, adding two more nested loops will just make things even slower.

  • The Canvas
    p5.createCanvas(
      document.getElementById(STATIC_NOISE_PIXELS_DIV).offsetWidth,
      HEIGHT);
    

    This is the usual code I use, nothing fancy.

  • The Slider
    slider = p5.createSlider(SLIDER.min,
                             SLIDER.max,
                             SLIDER.default_value,
                             SLIDER.step_size);
    slider.style("width", "500px");
    

    This is also a pretty straight-forward slider (although I think that just dropping it in after the canvas like this isn't what you're supposed to do). The main difference is that I'm adding a callback:

    slider.input(() => p5.redraw());
    

    This uses javascript's crazy arrow function syntax (not that I think the idea behind it is crazy, but the weird looking syntax and the fact that there's so many ways to declare functions seems to make the language too complicated for the little advantage you get with all the variations).

    Since this is a mostly static drawing I'm going to turn off re-drawing the canvas, but this callback tells p5 that if the user changes the slider's value then it should re-draw the canvas. p5 also has a similar function called changed, but that doesn't trigger the callback until you let go of the mouse button, while input lets you see the changes as you drag the slider.

    Note: input and changed don't show up under the slider documentation but rather under the DOM category of the documentation so I don't know how anyone is supposed to know that they exist without searching forum posts. This seems to suggest that there might be other features of the p5 language that exist but aren't well documented so it's just luck if you figure out that they are there…

  • Text Setup
    p5.fill("white");
    p5.stroke("white");
    p5.textAlign(p5.CENTER);
    p5.textSize(32);
    p5.noStroke()
    

    This sets the values that I'll use to show what the current slider value is to the user. Since I'm setting the pixel array values directly and not calling any functions like stroke or fill to do the visualization, setting it here will stick for the life of the sketch.

  • A Noise Plotter
    plotter = new NoisePlotter(p5, slider);
    

    I thought that it was getting cluttered up enough that it would make sense to break the plotting of the noise into a class, since I findi it easier to work with an object-oriented approach.

  • No Loop
      p5.noLoop();
    } // end setup
    

    The last thing in the setup is turning off the re-drawing of the canvas. I'm still not clear on what the difference is between putting it here and in the draw function. It seems to work the same in both cases.

Draw

Now, our draw function.

p5.draw = function() {
  plotter.draw();
  // add a label to show the amount the noise changes
  p5.text(`Noise Change: ${slider.value().toFixed(3)}`,
          p5.width/2 , p5.height - 10);
} // end draw

Because I'm deferring most of the plotting to the NoisePlotter object it just calls its draw method and then sets the text to let the user know what the current slider setting is.

The P5 Instance

new p5(static_pixels, STATIC_NOISE_PIXELS_DIV);

And then we create the p5 object…

The Output

Moving Version

The Sketch

Note for later: Setting the canvas too wide slows the frame rate down a lot (since the x for-loop uses the width) so I needed to both shrink the canvas and add an extra div (above) to stick the slider into - because it was only showing up under the canvas before because there wasn't enough room for it to slide up alongside it.

Check the framerate in the browser's javascript console with

move_p5.frameRate();

Moving Noise Plotter

class MovingNoise {
  constructor({p5=undefined,
               slider=undefined,
               red=PIXEL_ARRAY.RGB_MAX,
               green=PIXEL_ARRAY.RGB_MAX,
               blue= PIXEL_ARRAY.RGB_MAX,
               y_start_offset=1000} = {}) {
    this.p5 = p5
    this.slider = slider;
    this.red_fraction = red/PIXEL_ARRAY.RGB_MAX;
    this.green_fraction = green/PIXEL_ARRAY.RGB_MAX;
    this.blue_fraction = blue/PIXEL_ARRAY.RGB_MAX;
    this.y_start_offset = y_start_offset;
    this.noise_start = 0;
  } // end constructur

  draw() {
    let offset_y = this.noise_start + this.y_start_offset;
    let offset_x;
    let pixel_index;
    let intensity;
    let increment = this.slider.value();

    this.p5.loadPixels();    

    for (let y=0; y < this.p5.height; y++) {
      offset_x = this.noise_start;
      for (let x=0; x < this.p5.width; x++) {
        pixel_index = (x + y * this.p5.width) * PIXEL_ARRAY.CELLS_PER_PIXEL;
        intensity = this.p5.noise(offset_x, offset_y) * PIXEL_ARRAY.RGB_MAX;
        this.p5.pixels[pixel_index + PIXEL_ARRAY.RED] = (intensity *
                                                  this.red_fraction);
        this.p5.pixels[pixel_index + PIXEL_ARRAY.GREEN] = (intensity *
                                                    this.green_fraction);
        this.p5.pixels[pixel_index + PIXEL_ARRAY.BLUE] = (intensity *
                                                   this.blue_fraction);
        this.p5.pixels[pixel_index + PIXEL_ARRAY.ALPHA] = PIXEL_ARRAY.RGB_MAX;
        offset_x += increment;        
      } // end x for
      offset_y += increment;
    }// end x for
    this.p5.updatePixels();
    this.noise_start += increment;
  } // end draw
} // end NoisePlotter

Sources

A Noisy Walker

Note To Viewers At Home: This sketch disturbs my rabbit. Viewer discretion is advised.

This is a follow-up to the Random Walker post. In that previous post I made a walker that moved randomly in any (2D) direction. In this post I'll make a walker that moves according to values given by the p5 noise function. This is a pretty straight repeat of what's in the introduction to the Nature of Code.

The Noise Walker

The NoiseWalker keeps track of its position on the canvas as well as moving itself and plotting a circle in its current location. Its constructor starts it at the center of the canvas and creates a noise-offset vector to hold the inputs to the noise function. The noise-offset vector is initially given random x and y values so they aren't the same - since noise is a function if we passed in the same value to it for both x and y they would both get the same value out of it and we'd end up with a diagonal line instead of something that looks random-ish the way that we want.

The first call to the walk method will clobber the initial x and y positions so setting it to the center of the canvas isn't really important.

/**  a noise-based walker */
class NoiseWalker {
  /** create the Noise Walker
   * @param: p5 - a p5.js instance
   * @param: slider - widget to get the amount of noise offset change
   * @param: stroke_weight: how thick to make the circle line
   * @param: diameter of the circle
   * @param: fill_color: color to fill the circle
   * @param: stroke_color - color for the circle's line
   */
  constructor({p5,
               slider,
               stroke_weight=1,
               diameter=24,
               fill_color="cornflowerblue",
               stroke_color="black"} = {}) {
    let noise_upper_bound = 10**5

    this.p5 = p5;
    this.slider = slider;
    this.stroke_weight = stroke_weight;
    this.diameter = diameter;
    this.fill_color = fill_color;
    this.stroke_color = stroke_color;

    this.position = p5.createVector(p5.width / 2, p5.height / 2);
    this.noise_offset = p5.createVector(p5.random(noise_upper_bound),
                                        p5.random(noise_upper_bound));
  } // end constructor

Noise Value Offset

This property will return the current value of the slider. It's maybe overkill, but I'm trying to re-learn javascript along with p5 and follow along with The Nature of Code so I need things to be extra-obvious, sometimes.

/** getter for amount to add to the noise offset
 * @returns {number}: amount to add to the noise offset on walking
*/
get noise_offset_change() {
  return this.slider.value();
} // end get noise_offset_change

Walk

The walk method moves the walker by adding some noise to its position. The noise function outputs a value from 0 to 1 so I'll use it as a scale factor for the width and height of the canvas to get the new location of the walker. Note that we're not using the prior position of the walker when calculating the new one, just the noise.

/** update the position and noise offset */
walk() {
  this.position.x = this.p5.noise(this.noise_offset.x) * this.p5.width;
  this.position.y = this.p5.noise(this.noise_offset.y) * this.p5.height;
  this.noise_offset.add(this.noise_offset_change,
                        this.noise_offset_change);
} // end walk

Show Yourself

The Noise Walker's show_yourself method draws a circle wherever the walker happens to be at the moment. Nothing fancy.

show_yourself() {
  this.p5.strokeWeight(this.stroke_weight);
  this.p5.fill(this.fill_color);
  this.p5.stroke(this.stroke_color);
  this.p5.circle(this.position.x, this.position.y, this.diameter);
} // end show_yourself

The Sketch

I'll put the sketch in a function named "noise_walk".

NOISY_WALKER_DIV = "noisy-walker";

/** a sketch to make a circle-drawing walker that moves with noise */
function noise_walk(p5js) {
  const SLIDER_WIDTH = 500;
  const MEDIUM_TEAL_BLUE = p5js.color(0, 89, 179, 100);
  const MEDIUM_TEAL_BLUE_OPAQUE = p5js.color(0, 89, 179);
  let walker;
  let slider;

Set Up

The setup method will create the canvas, a slider which the user can use to change the size of the steps the walker takes along the noise offset, and the walker itself. The canvas and slider are placed based on the order in which you create them. In this case I wanted the slider underneath the canvas so I had to define it after the canvas (but before the walker since I pass it to the walker).

/** setup the canvas, walker, and slider */
p5js.setup = function() {
  p5js.createCanvas(
    document.getElementById(NOISY_WALKER_DIV).offsetWidth,
    400);

  // a slider to let the user change how much the noise is changing
  slider = p5js.createSlider(0, 1, 0.01, 0);
  slider.style("width", `${SLIDER_WIDTH}px`);

  walker = new NoiseWalker({p5: p5js,
                            slider: slider,
                            fill_color:MEDIUM_TEAL_BLUE});
  p5js.background("white");
} // end setup

Draw

The draw function moves and shows the walker.

/** move and draw the walker */
p5js.draw = function() {
  walker.walk();
  walker.show_yourself();

  p5js.textSize(32);
  p5js.textAlign(p5js.CENTER);
  p5js.fill("white");
  p5js.noStroke()
  p5js.rect(p5js.width/2 + 20, p5js.height - 35 , 250, 30);
  p5js.fill(MEDIUM_TEAL_BLUE_OPAQUE);
  p5js.text(`Noise Change: ${slider.value().toFixed(3)}`,
            p5js.width/2 , p5js.height - 10);
} // end draw

The End

And there's the code for the sketch at the top of the page.

Sources

A Random Walk(er)

This is a look at the What Is A Vector lesson on The Coding Train, part of the Nature of Code series. It's used in the series to show how to use vectors instead of object properties (e.g. maintaining and updating this.x and this.y) to hold the position of an object on the canvas.

I'm going to illustrate this by creating an object that takes a random walk.

The Walker

First up is a Walker class that keeps track of its position on the canvas, updates the position, and draws itself. I'm thinking that drawing itself doesn't seem right, but I suppose since we're only creating one object moving the drawing outside of the class is more work than what's needed.

The Constructor

/** The Random Walker */
class Walker {
  /** Create the walker
   * @param {integer}: x - x-coordinate
   * @param {integer}: y - y-coordinate
   * @param {number}: limit - minimum and maximum for the random
   * @param {integer}: p5 - p5 instance

   * As a side effect uses x and y to create `this.position`, a vector
   */
  constructor(x, y, limit, p5) {
    this.position = p5.createVector(x, y);
    this.limit = limit;
    this.p5 = p5
  } // end constructor

The Step Property

In the Coding Train video he increments the coordinates of the position vector separately, but since this is supposed to be about vectors I thought it should add another vector. This one was a little bit of a head-scratcher at first, though. p5 will make a two-dimensional vector for you with the x and y values set to some random value from -1 to 1 (it's a unit vector set to a random angle) using p5.Vector.random2D. But the p5 we need to use isn't our p5 but rather the global p5 object. The p5 instance we hold doesn't have the Vector class definition, for some reason (which is why you need to use createVector I guess).

Since the random values are from -1 to 1 I'm multiplying it by a user-specified integer to get a bigger step.

/** The next random step
    @returns: p5.Vector
*/
get next_step() {
  return p5.Vector.random2D().mult(this.limit);
} // end get next_step

The Update Method

It would have been nice if p5 vectors could be added using operators, but instead we need to use the add method. Weirdly, the Vector.add documentation doesn't cover the case where you pass a vector to another vector's add method, only the cases where you're adding the arguments separately, adding an array of values, or adding two vectors using the p5.Vector.add static method. It appears to do an in-place update, though, so I'll assume that that's what it does.

/** Add the ~next_step~ vector to the ~position~ vector, updating in-place */
update() {
  this.position.add(this.next_step);
} // end update

The Show Method

This is where the walker draws itself. Even though we're using a vector to hold the position, you still need to unpack the coordinates when calling the point method.

/** Draw the position as a point */
show() {
    this.p5.stroke(0, 0, 200, 100);
    this.p5.strokeWeight(5);
    this.p5.point(this.position.x, this.position.y);
  } // end show

Move and Show

Not really needed, but I'd rather make one function call for the user to move the walker and have it draw itself.

/**Convenience method to call ~update~ and ~show~ */
move_and_show() {
  this.update();
  this.show();
} // end move_and_show

The Sketch

Now the sketch. It seems a little awkward, but since the Walker definition is in a separate file from the sketch definition we need to remember add a script tag to the HTML for both of them. I guess you can think of that as the equivalent of an import, although it feels weird somehow.

Some Constants

const WALKER_SKETCH_DIV = "random-walker-sketch";
const HEIGHT = 400;
const STEP_LIMIT = 5;
const WHITE = 255;

The Sketch Function

Nothing fancy here, we're just declaring the function and the walker variable to hold our Walker object.

/** Sketch of a Random Walk */
function random_walk(p5js){
  let walker;

Set Up

Set up the sketch by drawing the canvas and creating a Walker.

/** Initial setup of the canvas and Walker */
p5js.setup = function() {
    p5js.createCanvas(
      document.getElementById(WALKER_SKETCH_DIV).offsetWidth, HEIGHT);
  walker = new Walker(p5js.width/2, p5js.height/2, STEP_LIMIT, p5js);
  p5js.background(WHITE);
} // end setup

Draw

Our draw function defers to the walker to do everything.

/** Draw a frame */
p5js.draw = function() {
    walker.move_and_show();
  } // end draw

The End

And there it is. One thing to note is that there's no checking of the position to see if it's wandered off the canvas so it's possible that it will wander completely off and updates won't be visible.

Sources

The Coding Train

P5 Reference

Graphing P5 Noise

The slider controls how big a step the graph takes along the noise space with each move to the right along the x-axis (moving the slider to the right makes the steps bigger so the line looks noisier).

What Is This About?

The plot is a visualization of the p5.js noise function. I got the idea for it from the Coding Train but the author of that site explains it by talking about it in a video so I thought I'd re-do it so I can understand what the code is doing a little better. The p5 documentation and the Coding Train both describe the noise function as producing Perlin noise, and Dan Shiffman (the Coding Train author) even goes on to point out that it's the original version of perlin noise from 1983 and in a later video he shows how to implement Simplex Noise, an improved version created by Ken Perlin, the author of the original Perlin Noise. On the github site for Processing, however, there are two issues that claim that processing's noise isn't really perlin noise but rather a form of Value Noise.

I don't know enough to know what's right, so I'll just call it noise or p5's noise and not worry about which it is.

Setup The Sketch

Now on to the code. This first section isn't really about plotting the graph but rather about setting up the P5 sketch in the HTML.

Name The Parent DIV

We're making a div to stick the sketch into the page so here's the ID we'll use for that div so the code can refer to it.

const NOISE_GRAPH_DIV = "noise-graph";

The Instance Container Function

To keep all the variables for the sketch contained in its scope we're going to use a function (noise_graph) to act as a closure.

function noise_graph(p5js){

Constants and Variables

Now we're into the p5 sketch code (contained within noise_graph). Before defining the setup and draw methods let's define some variables that we can use within them.

The Noise Space

The inputs to the noise function are what we'll call the X_NOISE_COORDINATE (or variations on that name, anyway). Every time the canvas gets re-drawn we'll re-draw the graph by putting in a sequence of x-values starting at STARTING_X_NOISE_COORDINATE and incrementing it by X_NOISE_COORDINATE_STEP_SIZE as we move along the x-axis of the canvas.

let X_NOISE_COORDINATE_START = 0;
let X_NOISE_COORDINATE_STEP_SIZE = 0.01;

The X_NOISE_COORDINATE_STEP_SIZE is sort of a re-mapping or re-proportioning of the x-value we use to draw the points for the noise function. The p5 canvas uses integers for the pixel coordinates so as we move across the canvas the x-coordinates are non-negative integers - \(0, 1, 2, \ldots, width - 1\). The noise function, on the other hand, works best with much smaller changes. If you use increments of 1 the output will look pretty much random, while our default of 0.01 will make our plot appear smoother and also show that each point falls reasonably close to the point that just precedes it. So as the x input to the vertex function goes up \(0, 1, 2, \ldots\) we'll increment the input to the noise function as \(0 \times 0.01 = 0, 1 \times 0.01 = 0.01, 2 \times 0.01 = 0.02, \ldots\).

But the noise function is, well, a function. If you keep passing in the same value to it you'll get the same value out of it so if we just use a scaled value of the x-coordinate (\(x \times x_{noise-coordinate-step-size}\)) as our input then every time p5 re-draws the sketch it will draw the same graph, producing what looks like a static image. In order to get an animated image we'll add an initial value to the noise input (NOISE-COORDINATE-START) that we'll increment every time we re-start the plot so that the noise function starts with a different value each time we re-draw the graph. So instead of \(x \times x_{noise-coordinate-step-size}\) we use \(x_{noise-coordinate-start} + x \times x_{noise-coordinate-step-size}\) as the input to the noise function.

The Slider

These are some variables so we can add a slider to allow the user to change the step-size to increment the noise input. The slider step size of 0 means that there will be a continuous change in the value as the slider is moved, as opposed to giving it discrete values to jump to.

const MINIMUM_NOISE_COORDINATE_STEP_SIZE = 0;
const MAXIMUM_NOISE_COORDINATE_STEP_SIZE = 1;
const SLIDER_WIDTH = "500px";

let slider;
let DEFAULT_NOISE_COORDINATE_STEP_SIZE = X_NOISE_COORDINATE_STEP_SIZE;
let SLIDER_STEP_SIZE = 0;

Colors

These are the color settings for the plot.

let BLACK = 0;
let WHITE = 255;
let OPACITY = 20;
let LINE_COLOR = BLACK;
let BACKGROUND_COLOR = WHITE;

Setup

Now we'll monkey-patch the setup function that gets called once at the start of the animation.

p5js.setup = function() {

Canvas and Line

The only possibly not-so-obvious thing here should be the document.getElementById(NOISE_GRAPH_DIV).offsetWidth argument to the createCanvas method which grabs the width of the container in which the plot is being put (not the width of the entire window).

let canvas = p5js.createCanvas(
  document.getElementById(NOISE_GRAPH_DIV).offsetWidth, 400);
p5js.stroke(LINE_COLOR);
p5js.noFill();

Slider

Now we'll create the slider to let the user play with the step-size for the noise input.

slider = p5js.createSlider(
  MINIMUM_NOISE_COORDINATE_STEP_SIZE,
  MAXIMUM_NOISE_COORDINATE_STEP_SIZE,
  DEFAULT_NOISE_COORDINATE_STEP_SIZE,
  SLIDER_STEP_SIZE);
slider.style("width", SLIDER_WIDTH);

Draw

Here's where we define the draw function that gets called repeatedly to animate our sketch.

The Draw Function

Monkey patch the draw method on the p5 object.

p5js.draw = function() {

Setup The Next Frame

We'll paint the canvas with a semi-opaque white on every refresh so that you can sort of see how the graph changes with each loop. We also create some variables:

  • noise_step_size is the amount that the x_noise-coordinate changes as the plot moves from left to right along the x-axis of the graph
  • y will be the y-coordinate for the points in our plot
p5js.background(BACKGROUND_COLOR, OPACITY);
p5js.noFill();
p5js.stroke(LINE_COLOR);
let noise_step_size = slider.value();
let y;

Plot Next Frame

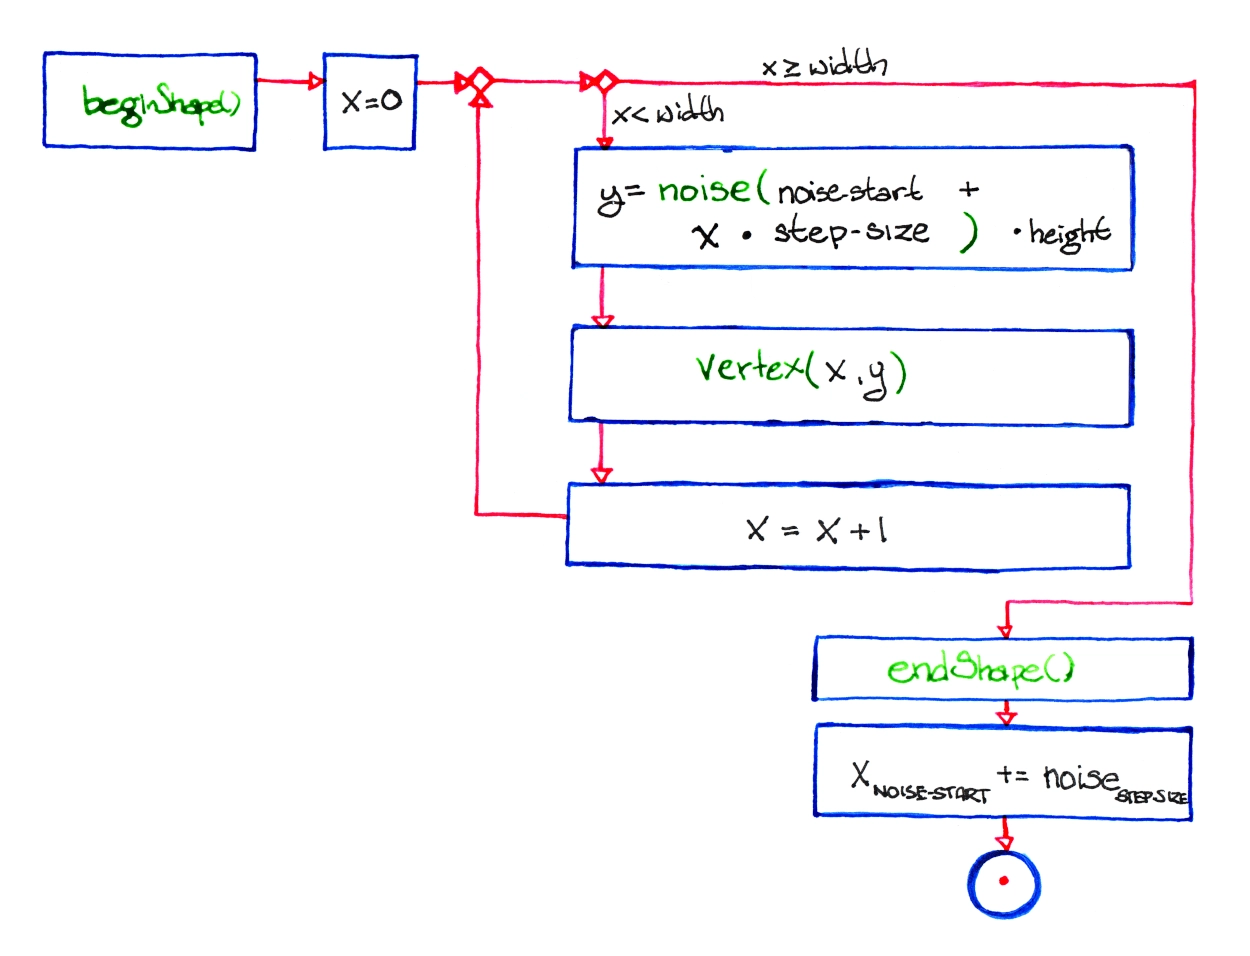
Here's where we plot the graph. We're going to draw the graph using connected line segments so before the loop starts we'll tell p5 to start the shape.

p5js.beginShape();

To draw the graph we'll traverse the canvas from left to right with a for-loop. The x variable in the for-loop corresponds to the x-coordinate in the canvas where we're going to put the next point in our line.

for (let x = 0; x < p5js.width; x++) {

Now we'll get the y-coordinate for the point. Since the noise function's output is a float from 0 to 1 we can use it to set the y-coordinate to a fraction of the canvas' height by multiplying \(noise \times height\).

y = p5js.noise(X_NOISE_COORDINATE_START + x * noise_step_size)
  * p5js.height;

Now that we have the x and y coordinates we can draw the next segment by adding a vertex to the shape.

p5js.vertex(x, y);

That's the end of the for-loop. Now, outside of the loop we call endShape to stop drawing our graph (otherwise it'd draw a line back to the start of the graph the next time we went through the loop).

p5js.endShape();

Move the Noise Input

Now we'll move the input for the noise function at the start of the graph a little. If we didn't the input to the noise function as we went through the loop would always be the same so our plot would just draw the same thing over and over again (well, if we move the slider to change the noise_step_size it wouldn't be exactly the same, but the starting point would always be the same).

X_NOISE_COORDINATE_START += noise_step_size;

I'm not showing the closing braces (}) to end the functions but at this point we close the draw and noise_graph functions, ending our definitions for the sketch.

Slider Label

p5js.textSize(32);
p5js.textAlign(p5js.CENTER);
p5js.fill("white");
p5js.noStroke()
p5js.rect(p5js.width/2 + 20, p5js.height - 35 , 250, 30);
p5js.fill("black");
p5js.text(`Noise Change: ${slider.value().toFixed(3)}`,
            p5js.width/2 , p5js.height - 10);

Once Again But As a Picture

for-loop-diagram

Make The Sketch Object

Next we pass our sketch definition to p5 to build it and attach it to our HTML div.

new p5(noise_graph, NOISE_GRAPH_DIV);

And That's It, Then

At this point we should have a graph that helps to visualize how the noise function changes over one-dimension. Noise to the aside, it's also a useful template for plotting any kind of graph, you'd just have to change the setting of the y value to whatever other function you want to visualize.

Sources

P5 Reference:

Wikipedia on Noise:

The original javascript came from Daniel Shiffman's Coding Train:

Bugs on the (now deprecated) github processing Issues page pointing out that noise isn't really perlin noise:

Bubba Test

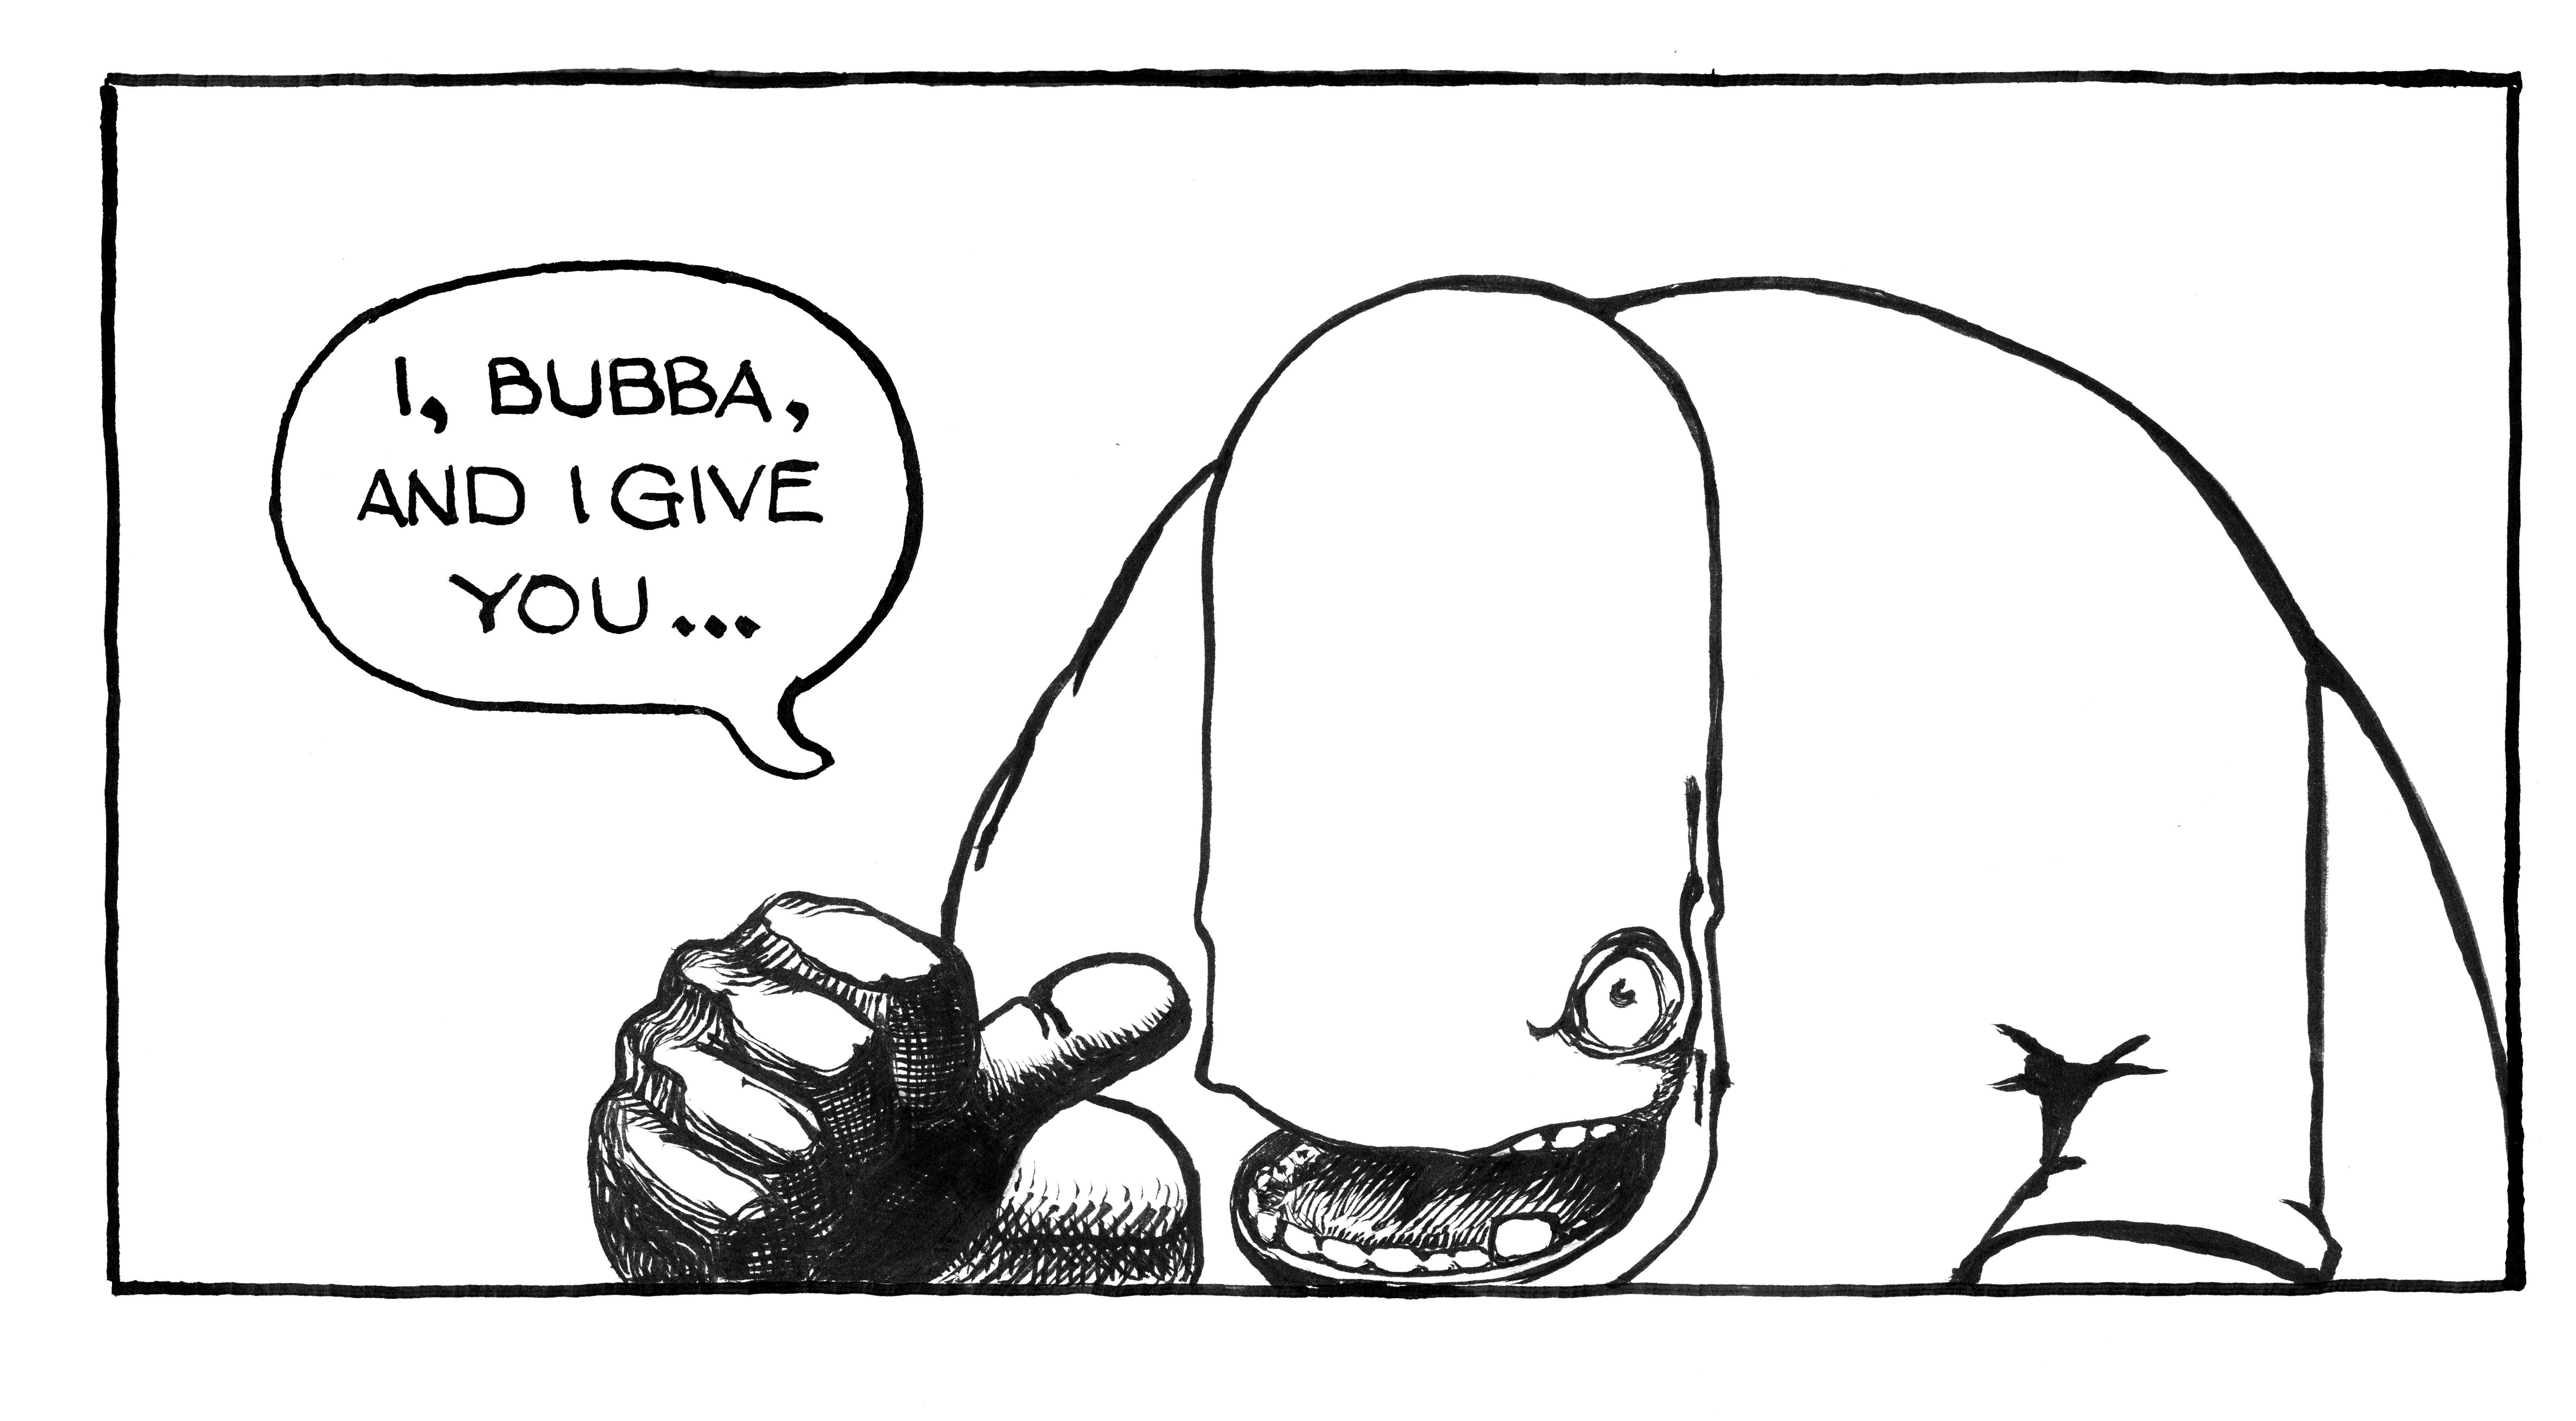
Big Bubba

This is a webp image converted from a 600 dpi scanned image that was converted to grayscale using gimp.

  • Original scanned png: 12 Megabytes
  • After grayscale conversion: 2.8 Megabytes
  • Webp Version: 639 Kilobytes

600 ppi image

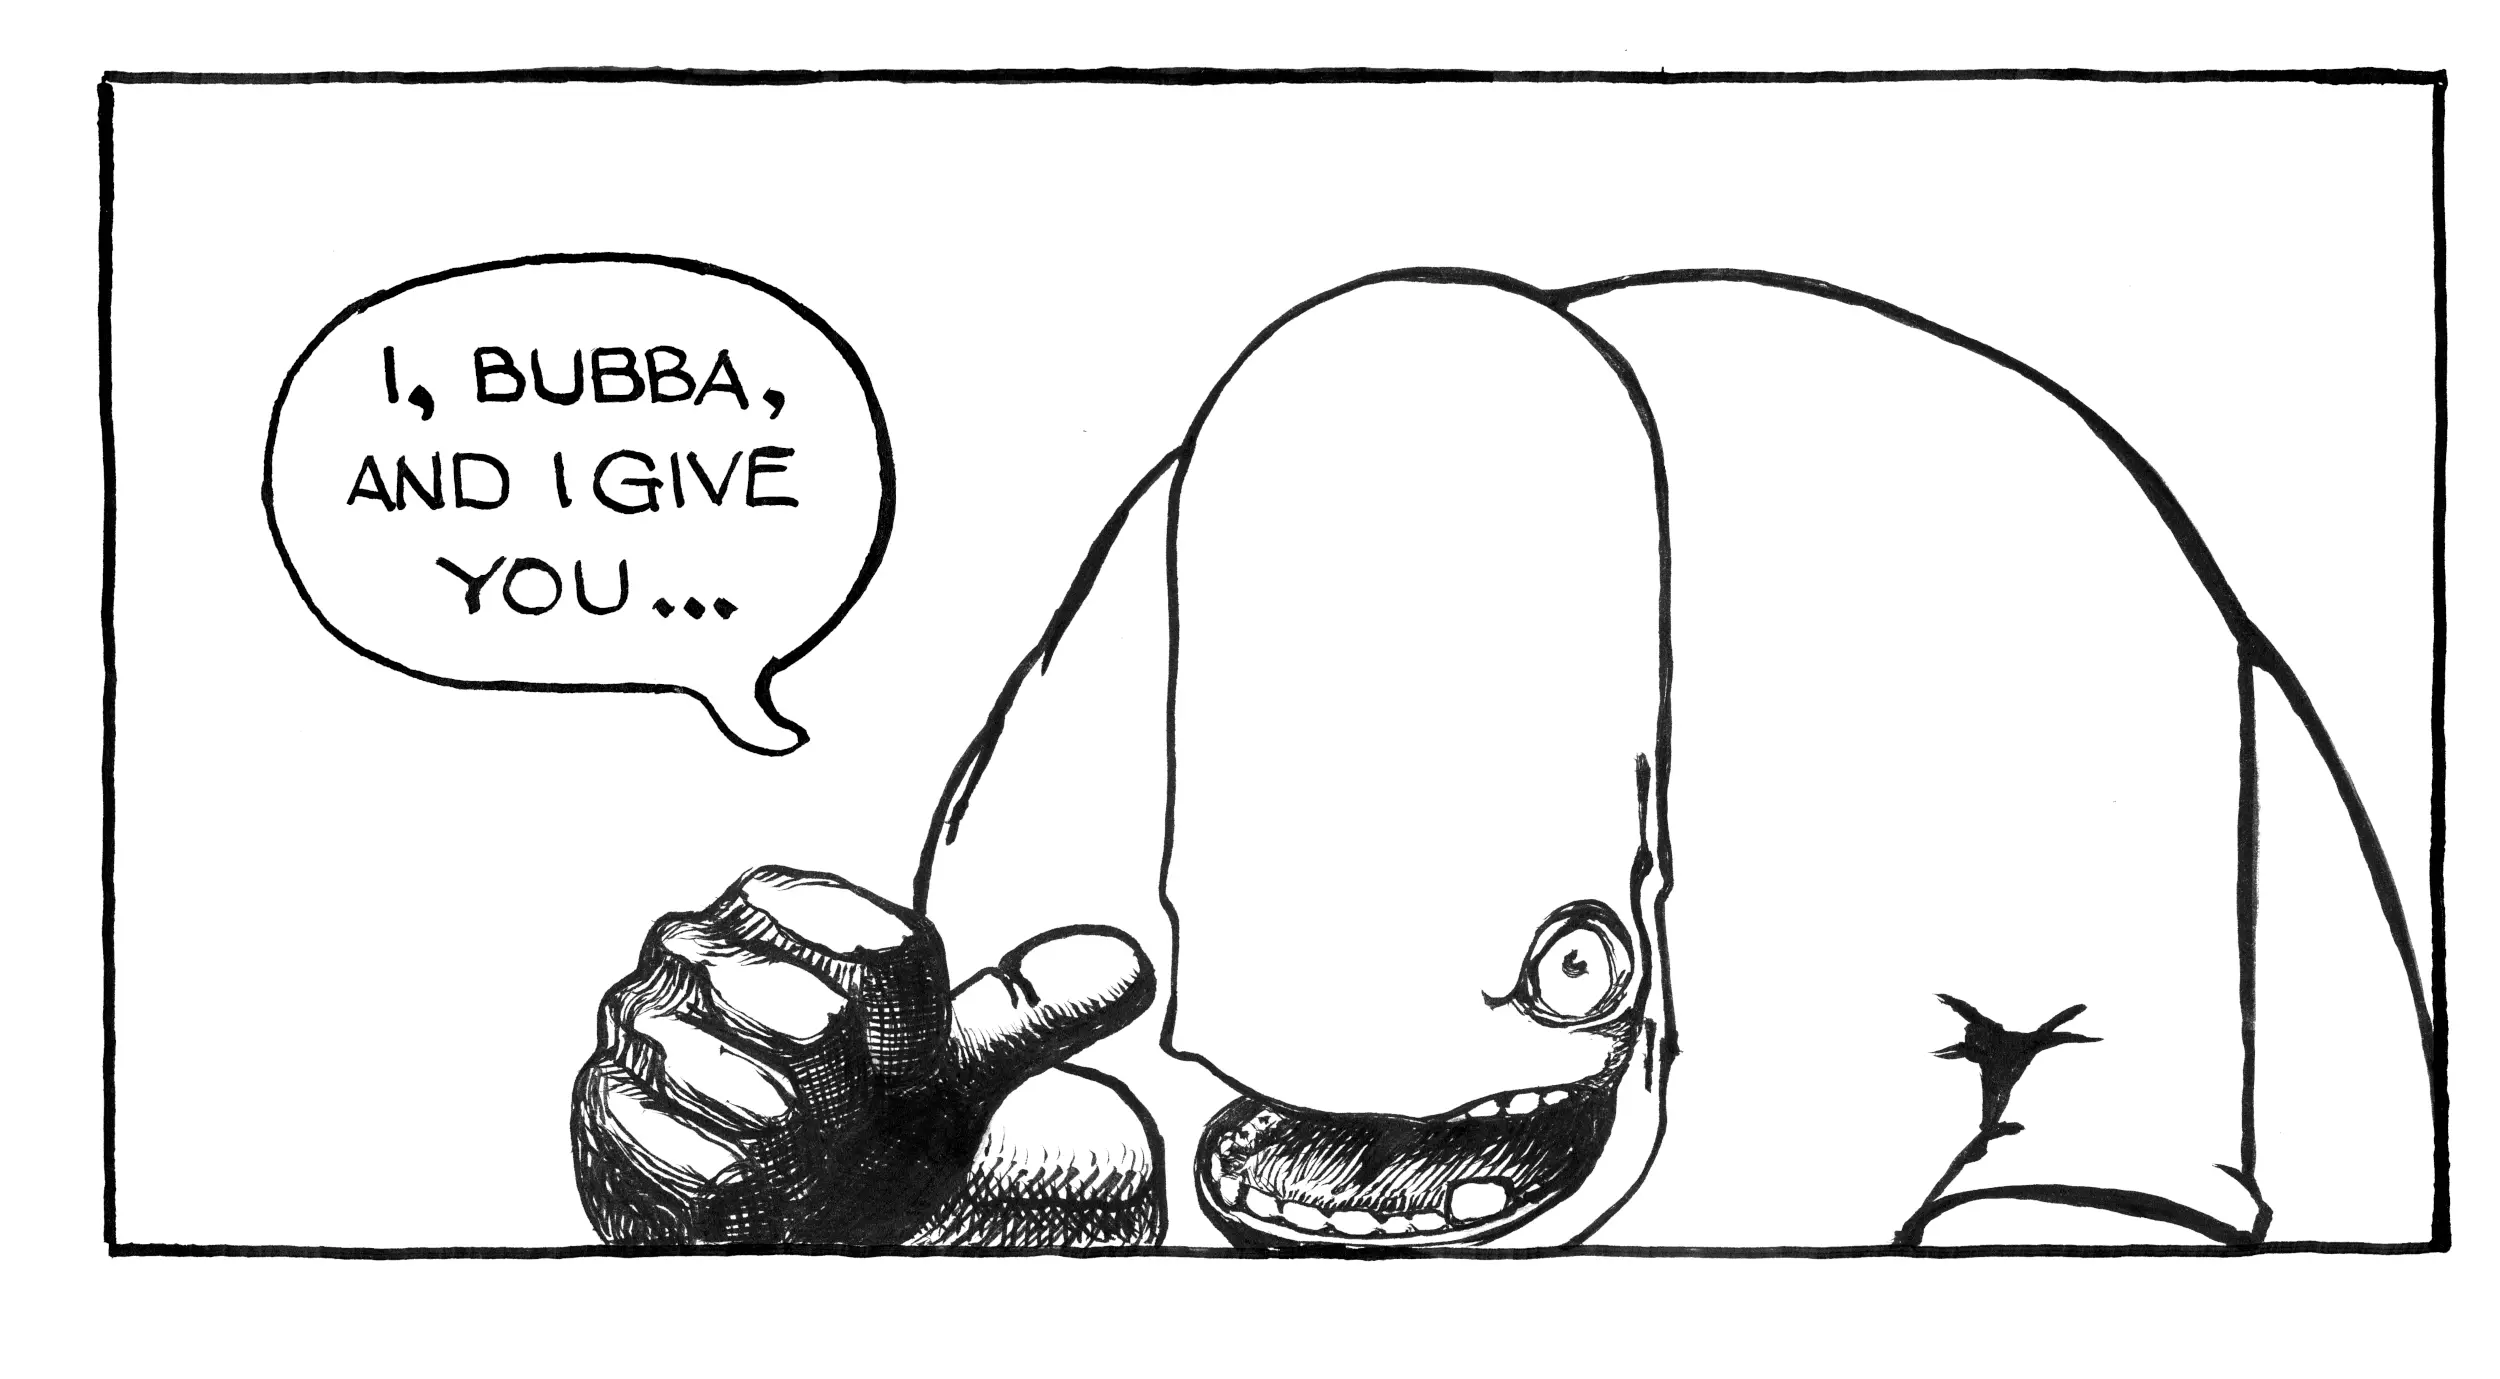
Smaller Bubba

This is the same image but scaled down to a width of 2,500 pixels.

  • Scaled PNG: 501 Kilobytes
  • Webp Version: 116 Kilobytes

2,500 Pixel Width

Hosted On PCloud

This is the smaller image hosted on pcloud instead of as part of this repository. To do this you need to go to put the image in the pCloud "Public Folder" and then go to the pcloud website to get the URL. The "Link For Websites" they give you is an anchor so you can download the image (or whatever file you're sharing, so you need to grap the URL and put it in an img tag instead).

Conclusion

The intention here was to figure out either what size to make the image so that it won't eat up my GitHub quota or to see how well putting it on pCloud would work. This particular image might not have been the best test for this, though, as the file size endede up being small enough that worrying about using an external image host is maybe not worth the time spent thinking about it. But I'll keep testing as I make the images more complex and perhaps at some point it will make sense to use an external host. In the mean time, using the bigger file didn't really improve the image so at least I know that using 2,500 pixels for the width is good enough.

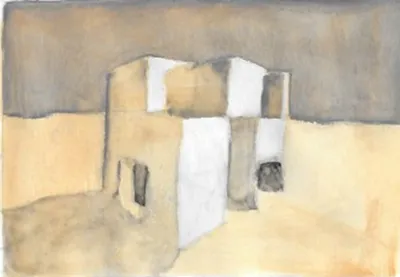
Grisaille Perspective Study

A small sketch with satin-glaze over a yellow-ochre ground. It kept the yellow-ochre from being picked up by the black and white watercolor but then they didn't behave quite like I was expecting.

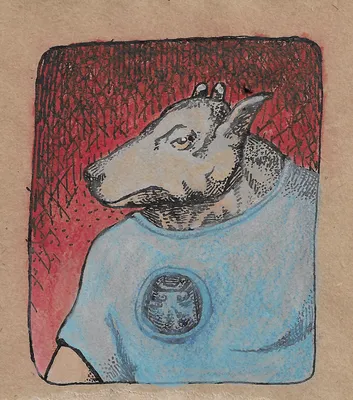
Hooded

Hooded

An experiment using white kraft paper. Maybe I'll stick to brown.